cancel

[Technical Tips] Getting Started with 86HMI Editor and ArduBlock: Simple HMI Stepper Motor Control Example

2026-06-30

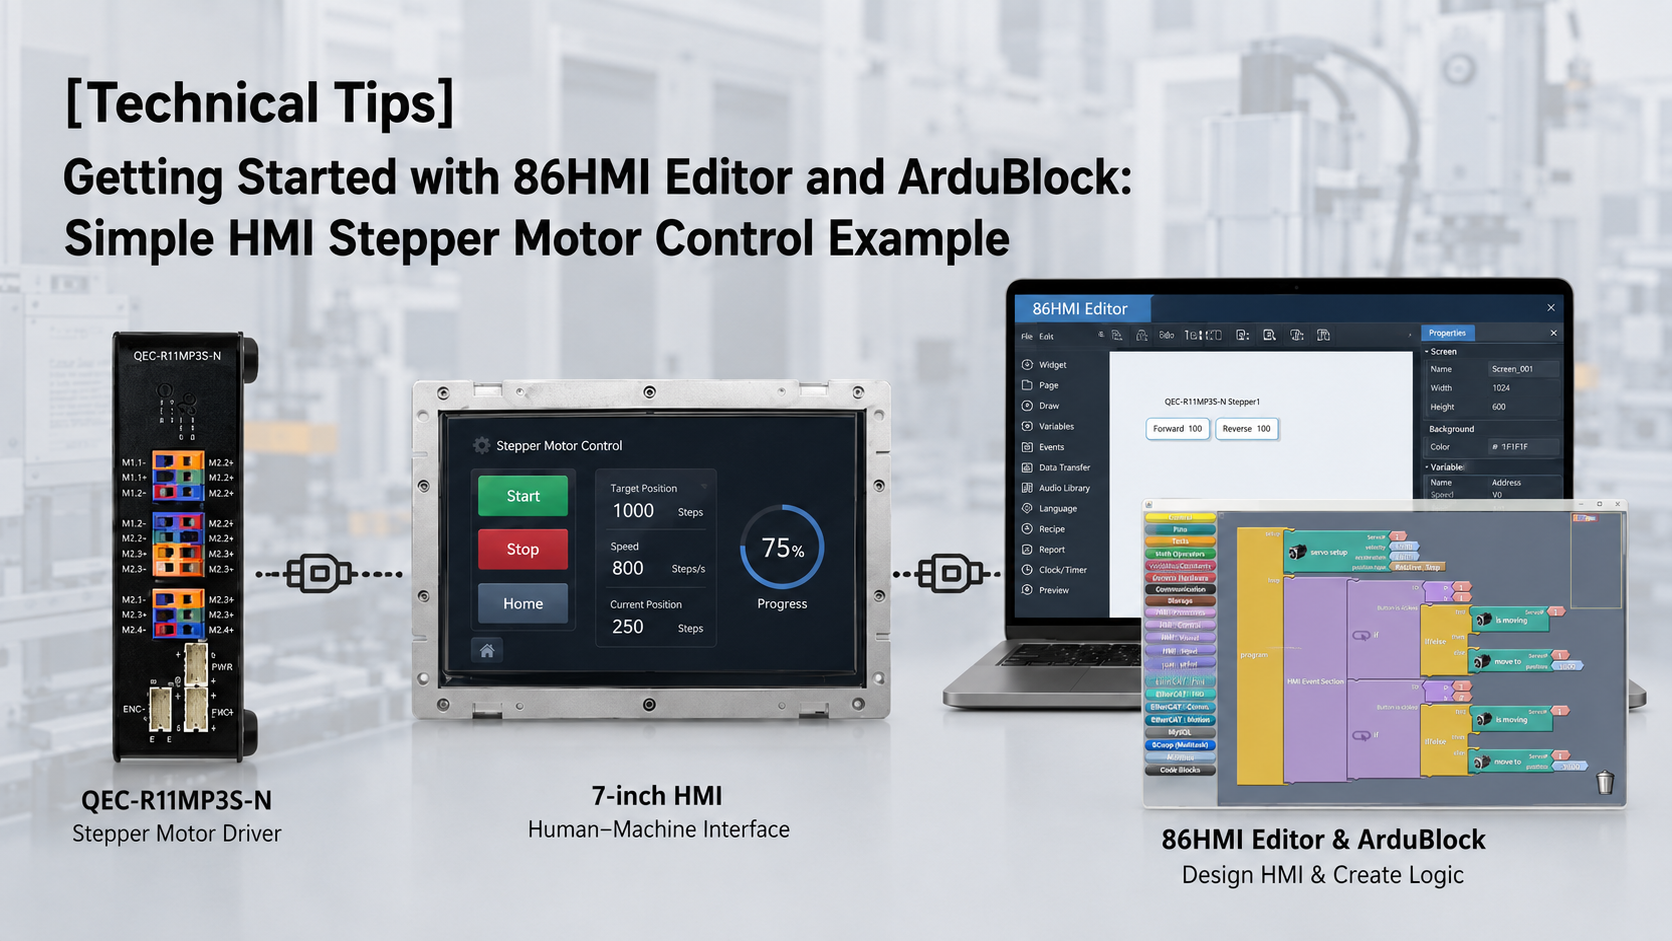
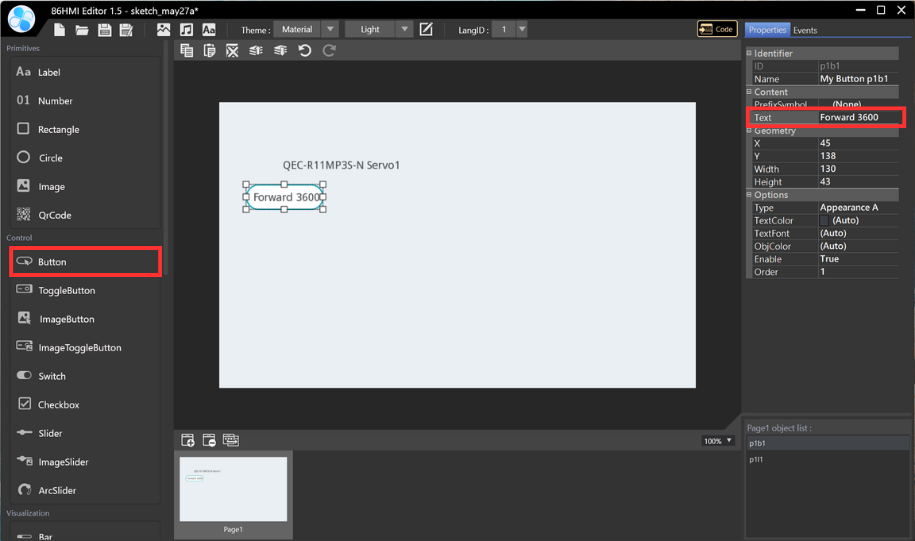
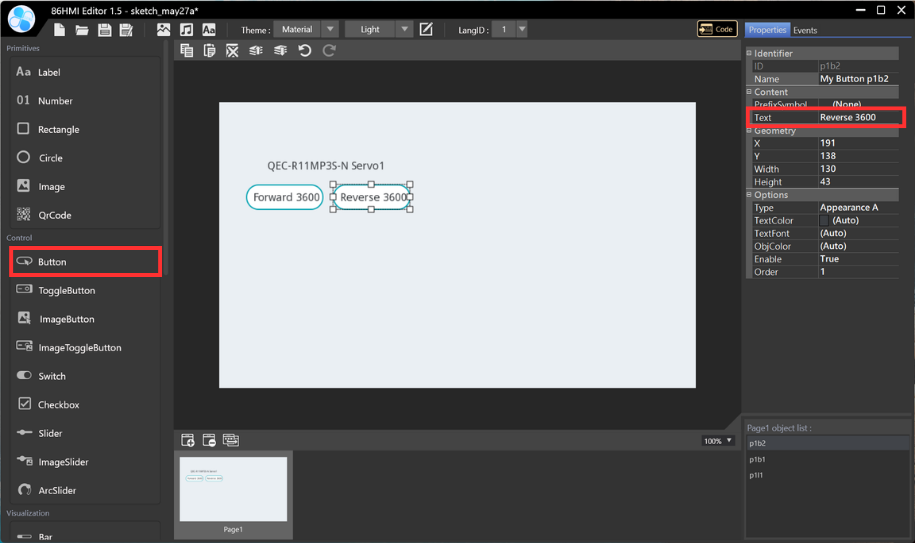
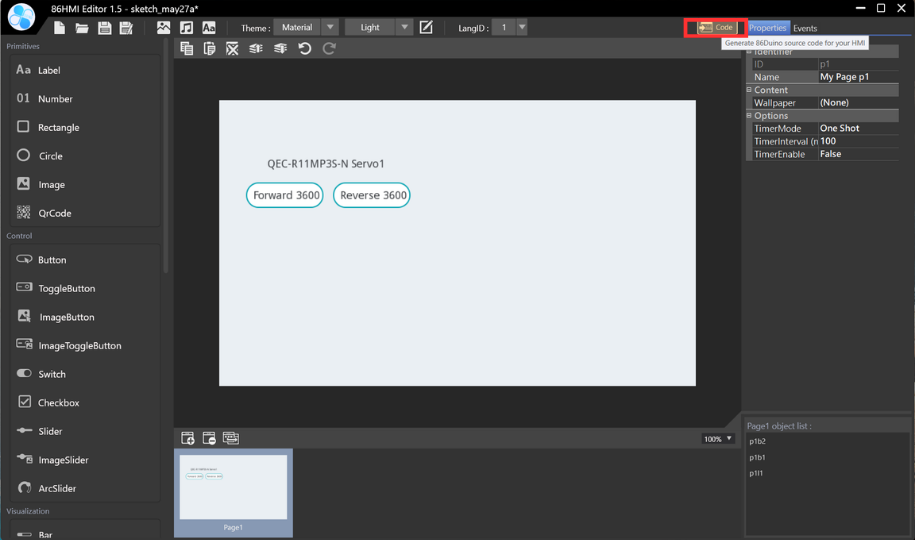
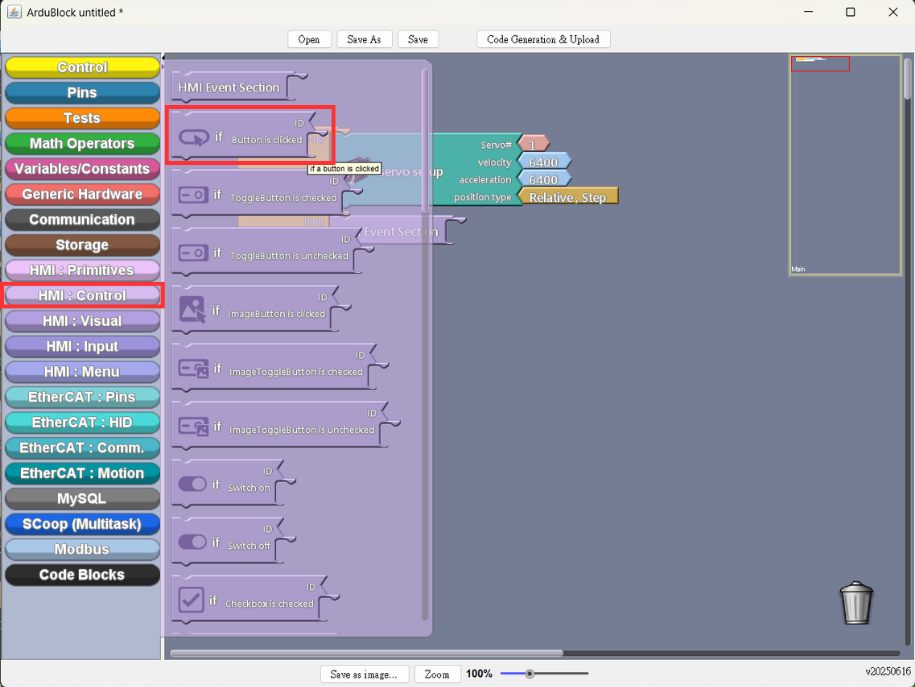
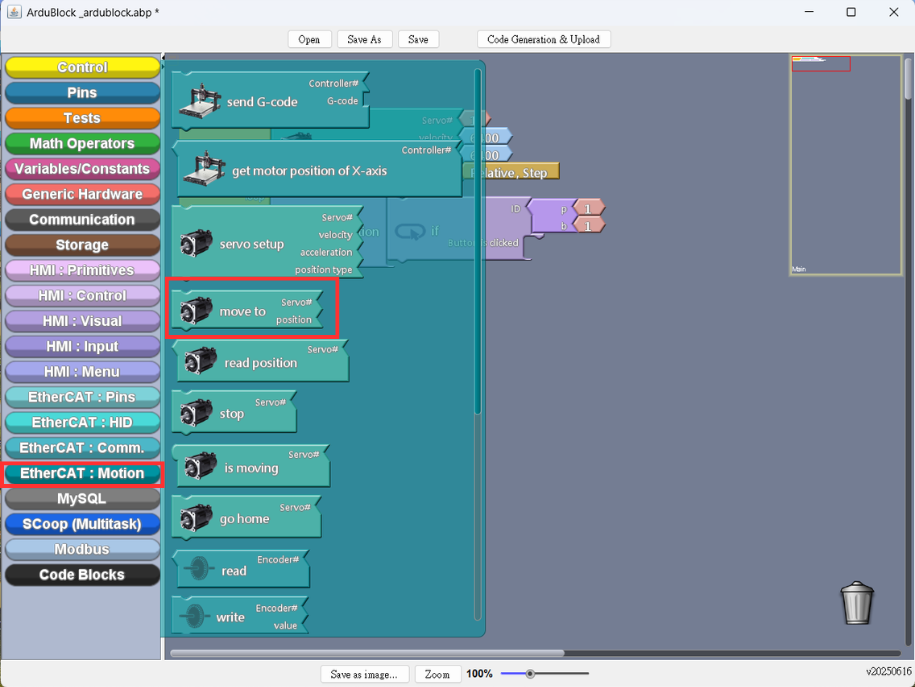
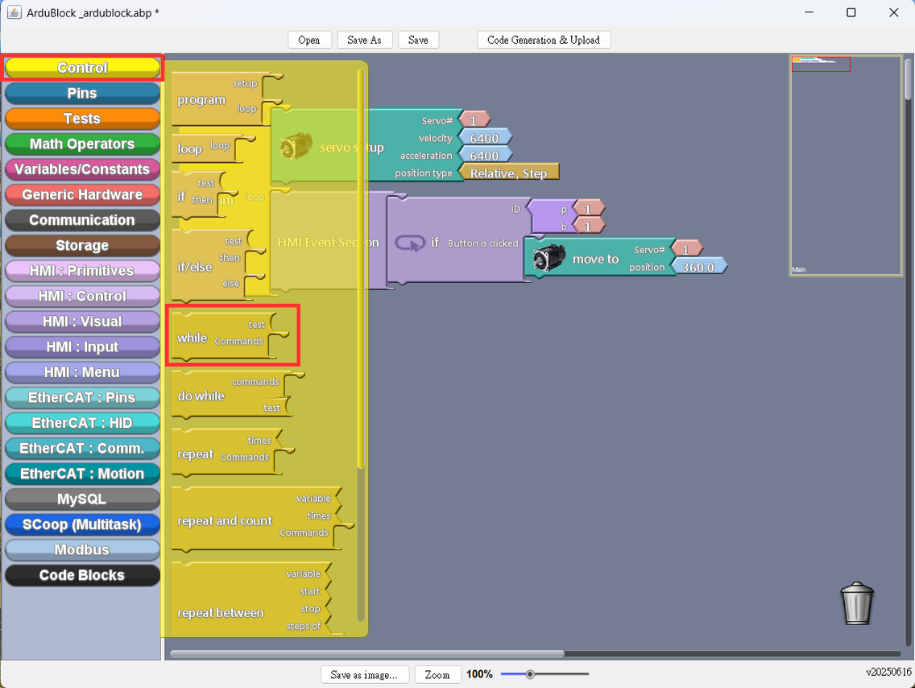
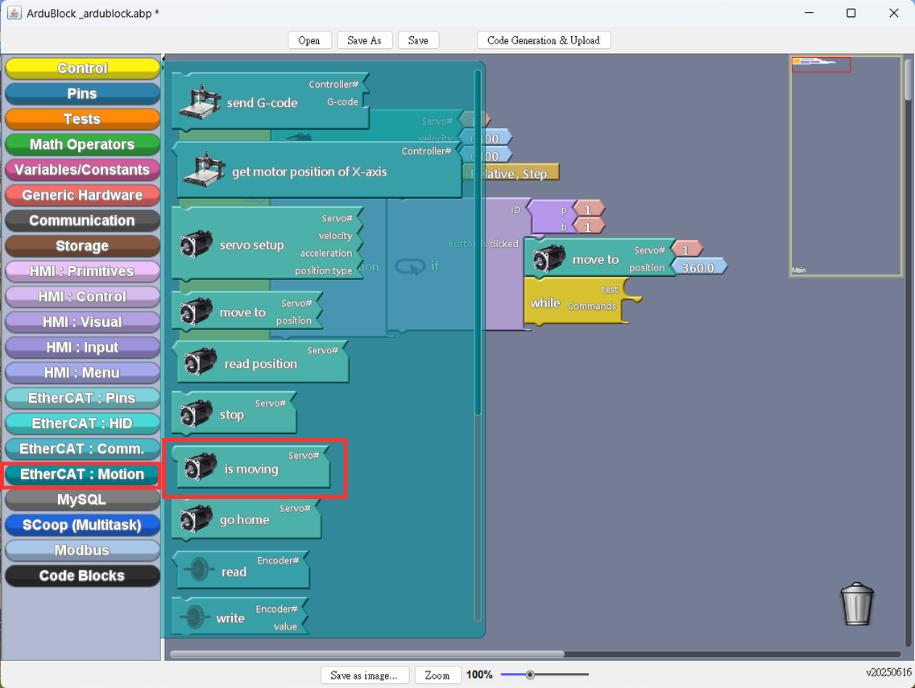
This example demonstrates how to quickly implement stepper motor control using the 86Duino platform — covering HMI button design with 86HMI Editor and drag-and-drop programming with ArduBlock.

Stepper Motor Control Example tips

86Duino IDE

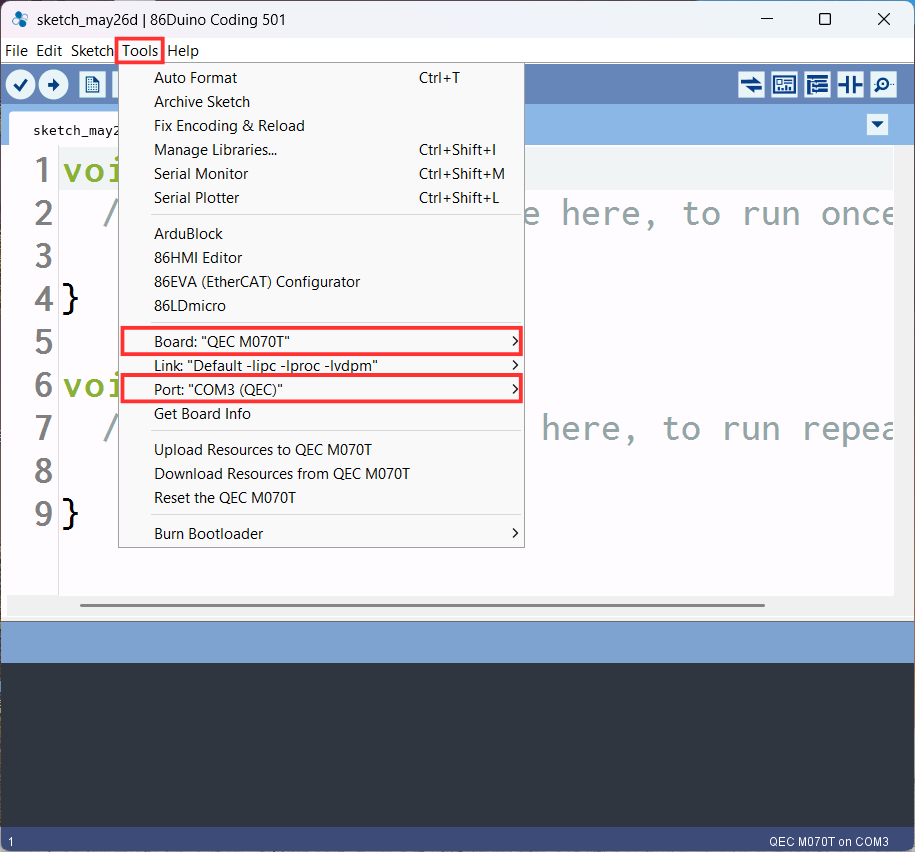
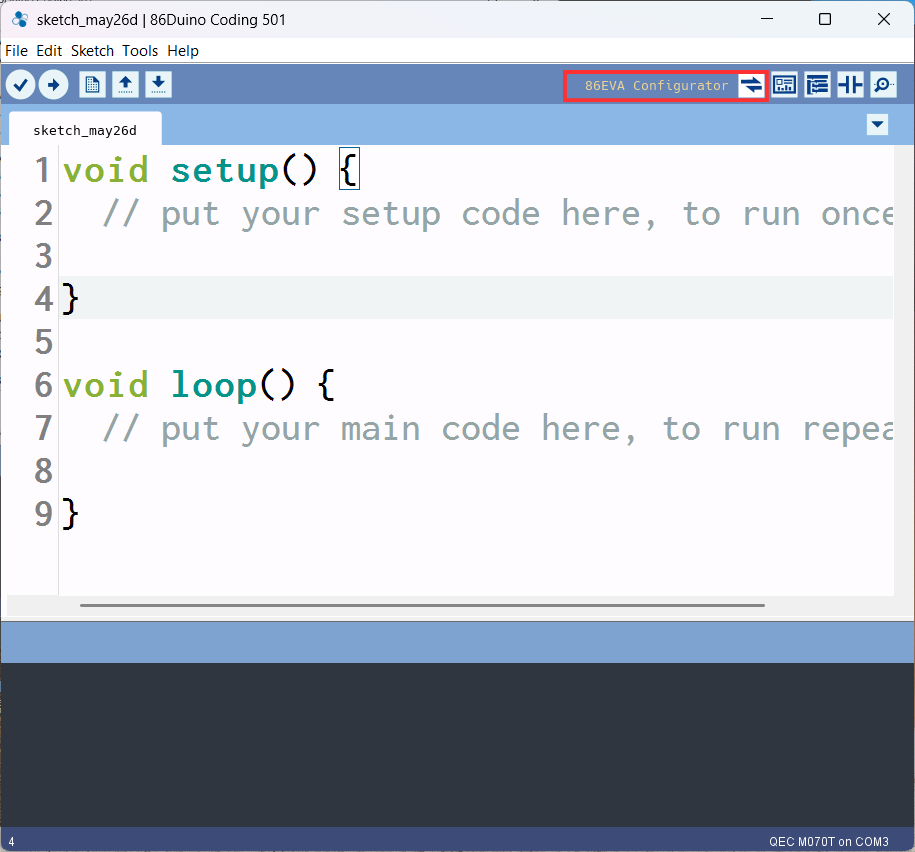
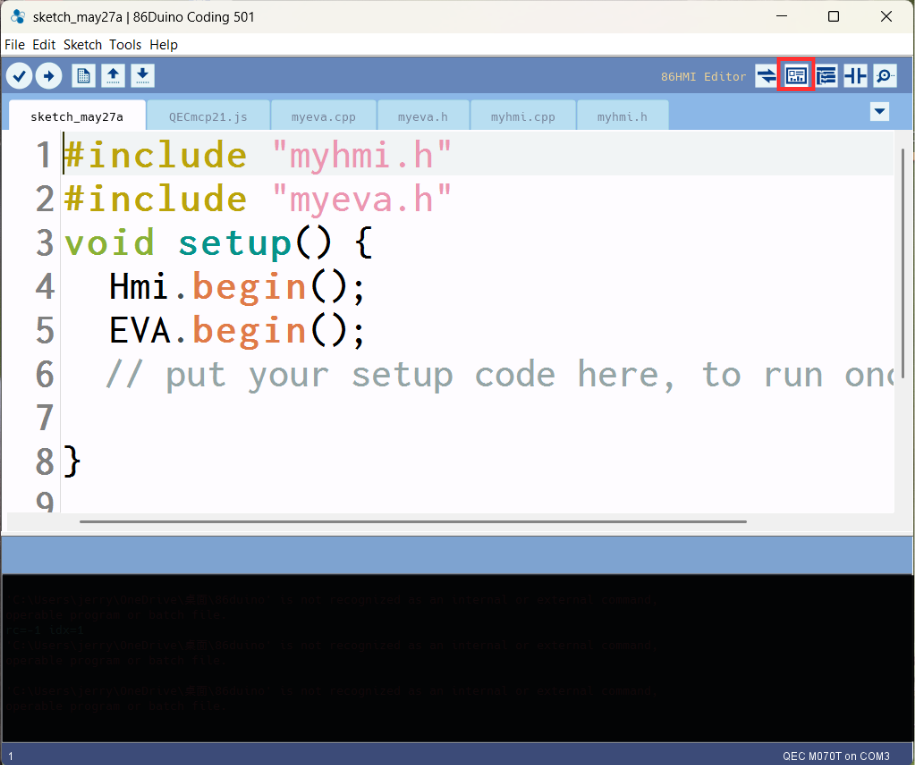
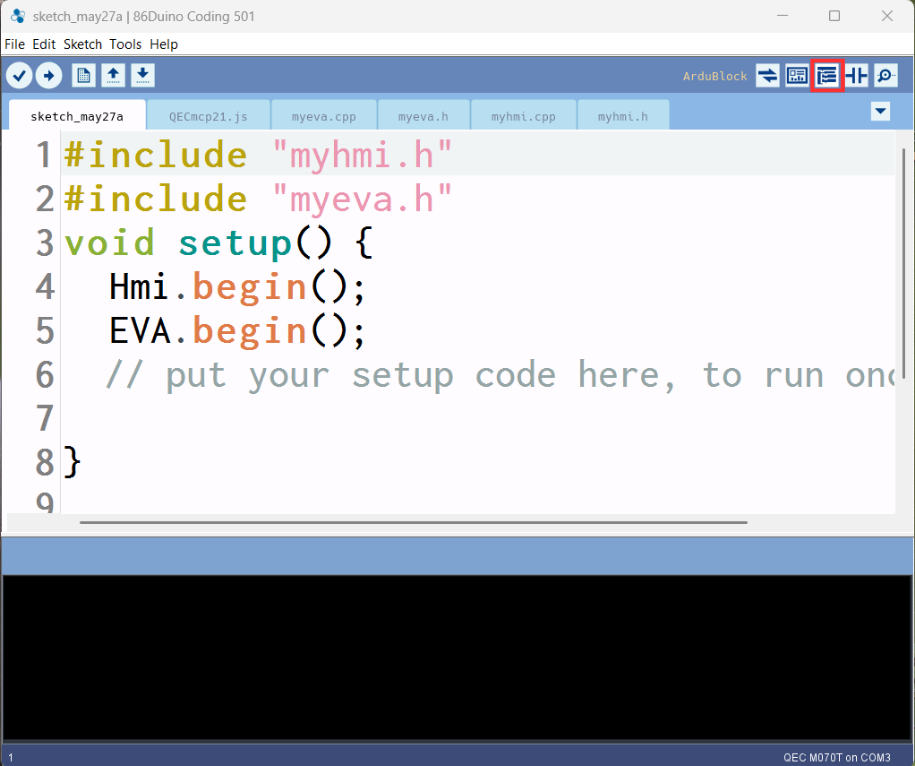
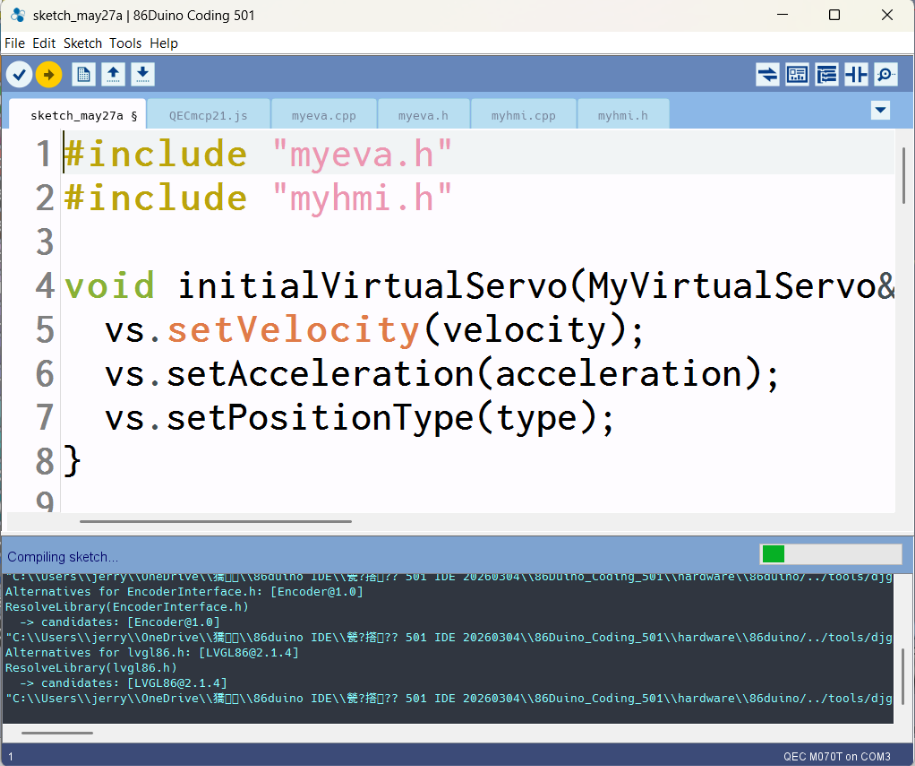
To compile and upload the control program to the QEC controller, the 86Duino IDE is required. The 86Duino IDE provides an Arduino-compatible development environment used to upload programs generated from ArduBlock or written using standard C/C++.
Readers can download the latest version of the 86Duino IDE from the QEC website: 86Duino Coding IDE
For users who are new to the platform, a step-by-step guide is also available to help you set up the development environment and get started with your first project: Getting started with the 86Duino

Hardware Setup

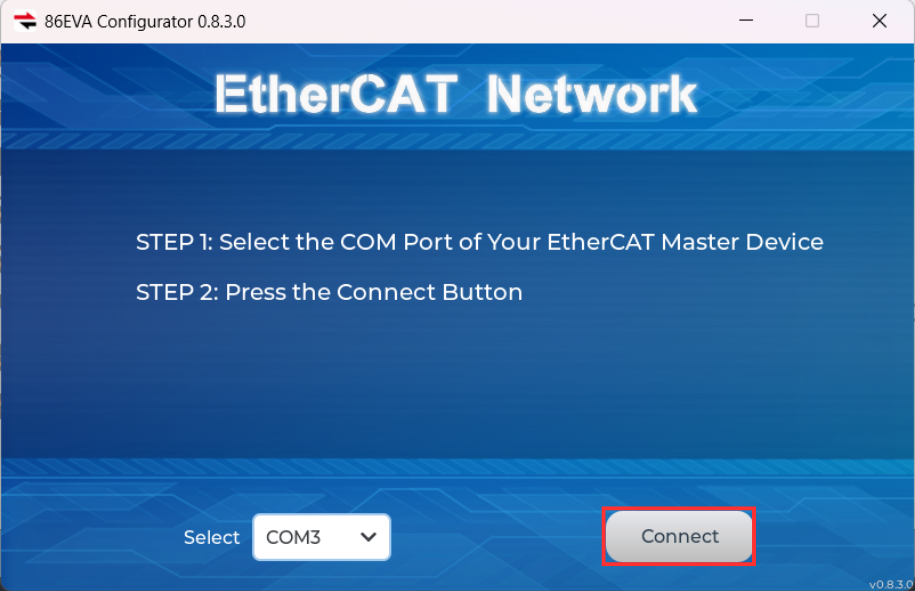
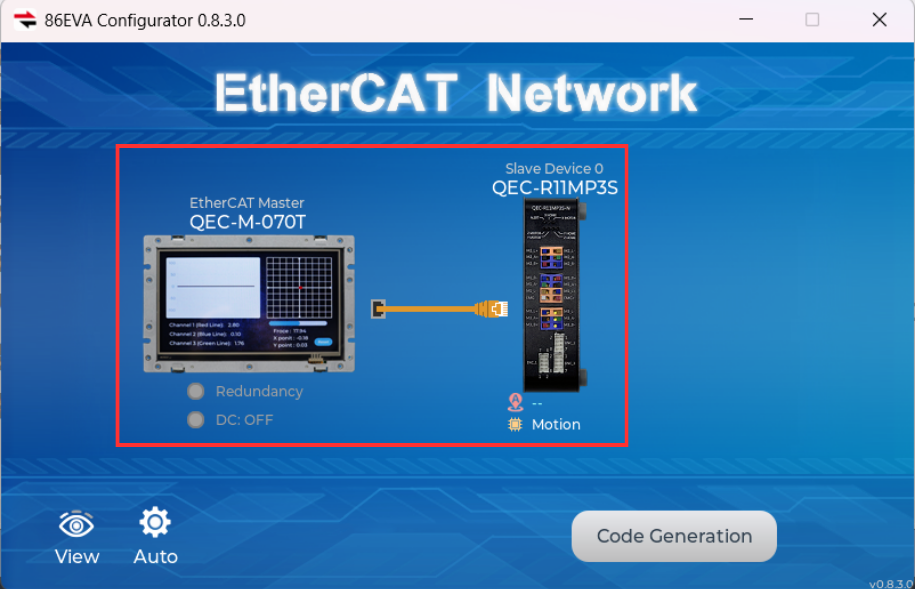
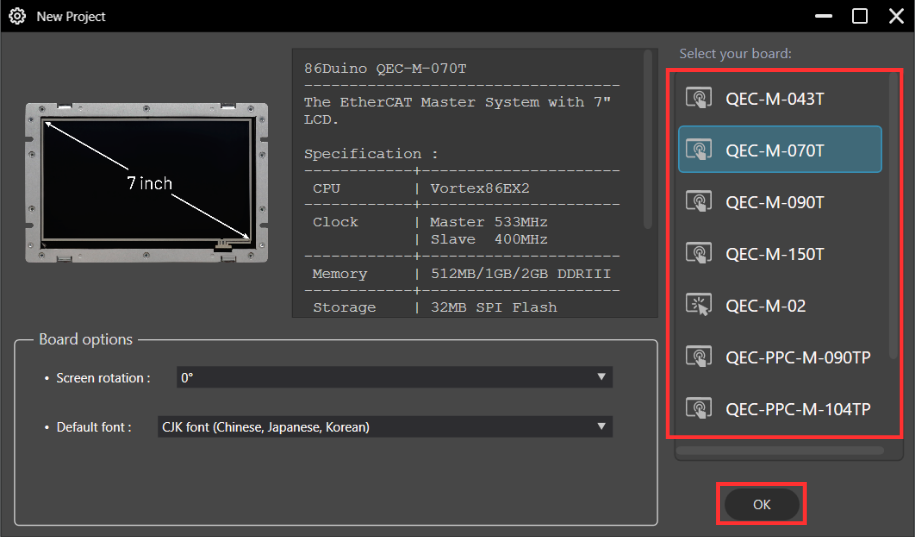
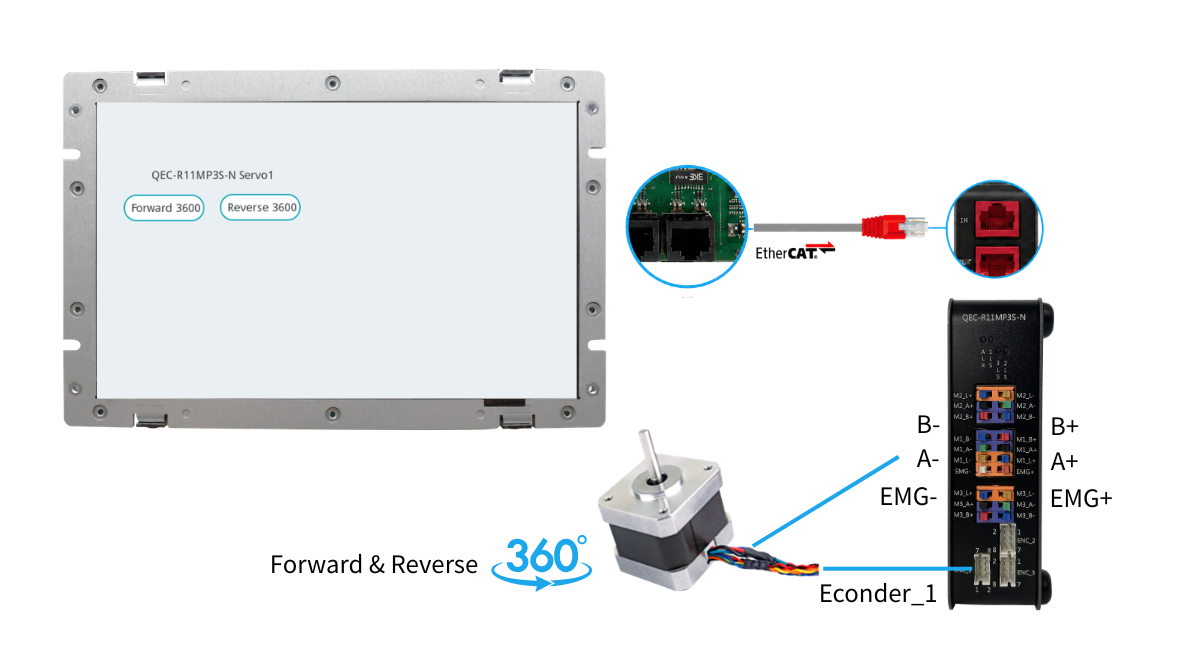
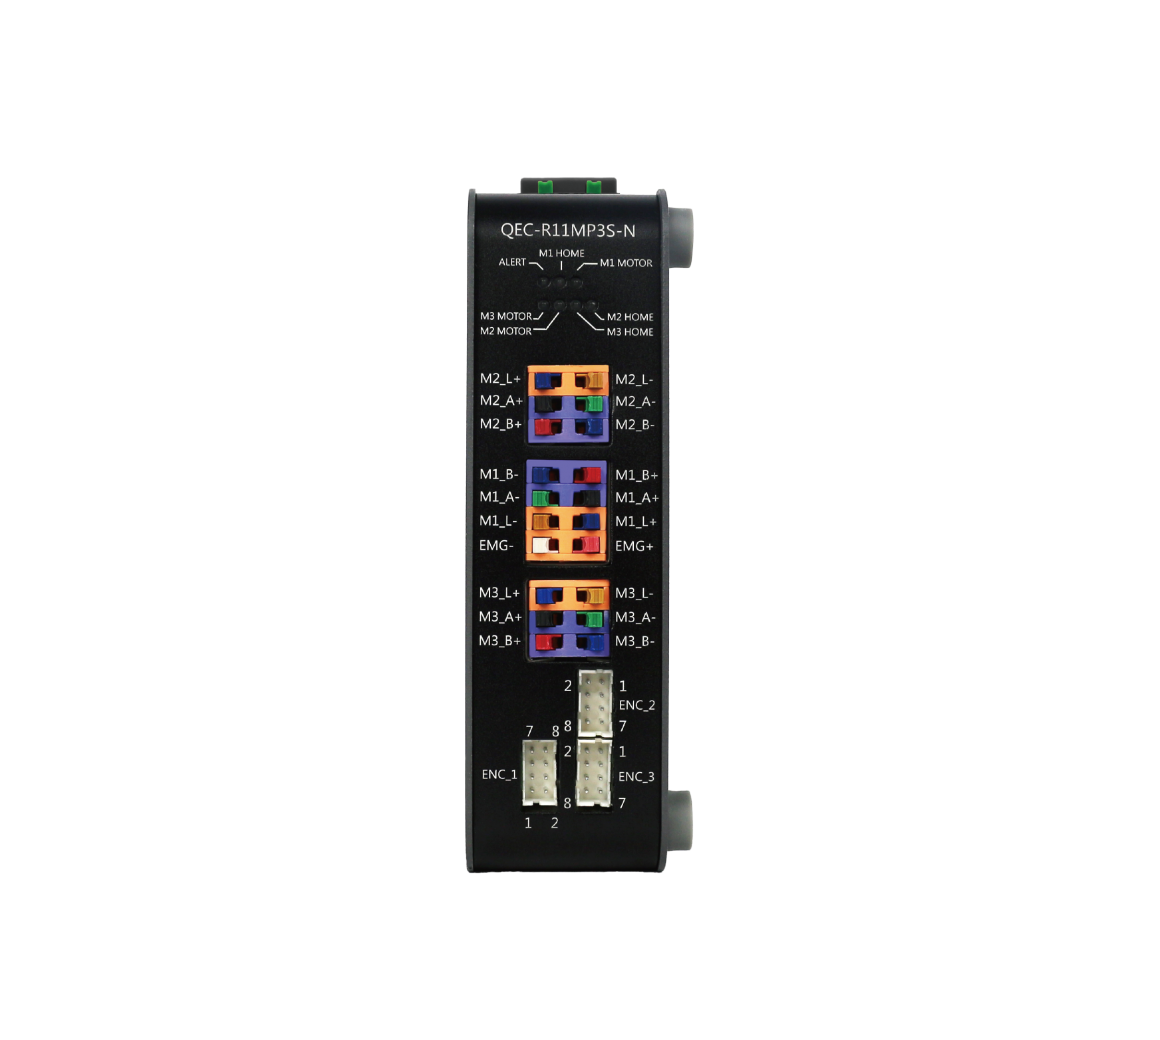
The hardware setup uses the QEC-M-070T as the EtherCAT MDevice controller and the QEC-R11MP3S-N as the SubDevice stepper motor driver:

  • QEC-M-070T – EtherCAT MDevice HMI solutions used for interface design and control logic execution
  • QEC-R11MP3S-N – EtherCAT motion control with 3-axis Stepper Motor Controller
  • 24V power supply
  • Ethernet cable (for EtherCAT communication)

Implementation Steps

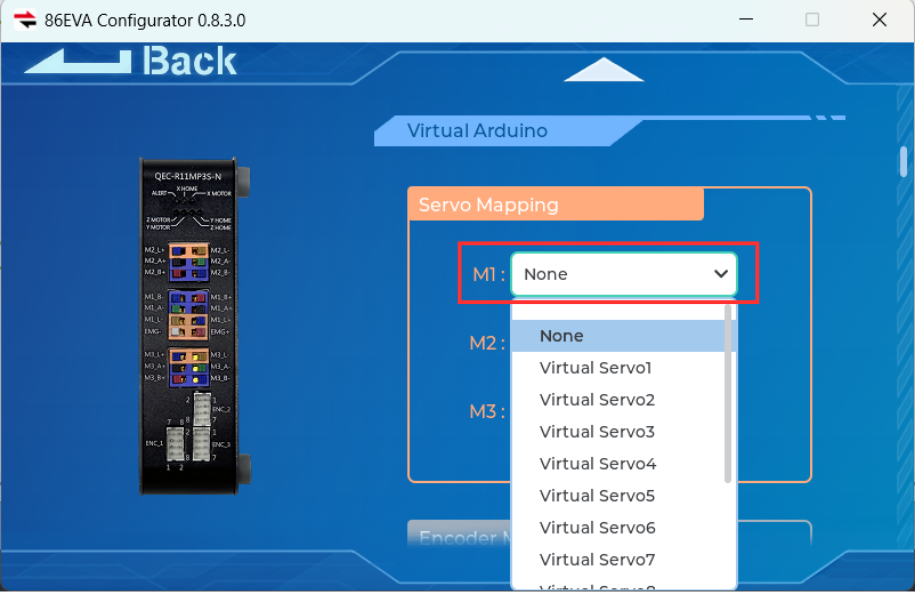
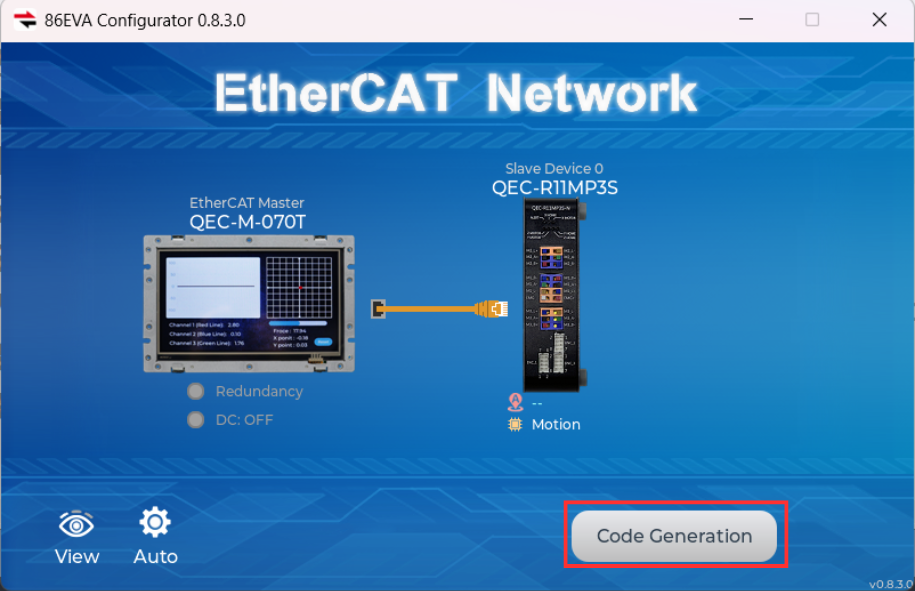
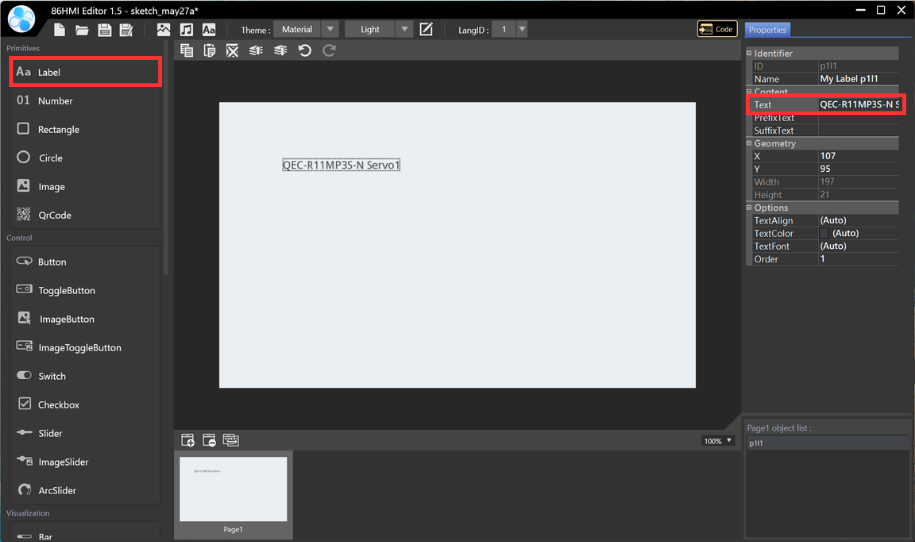
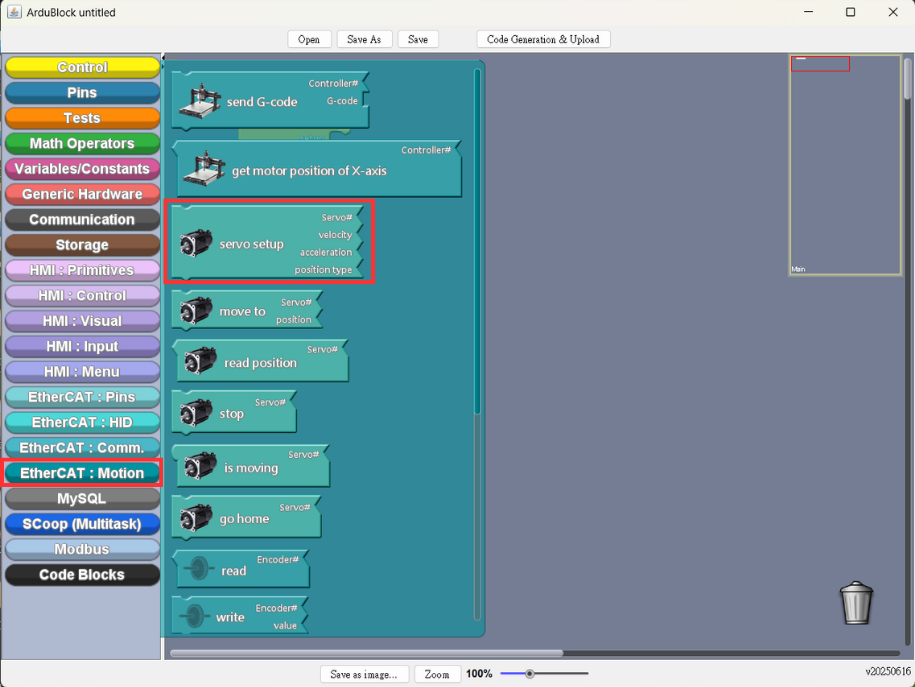
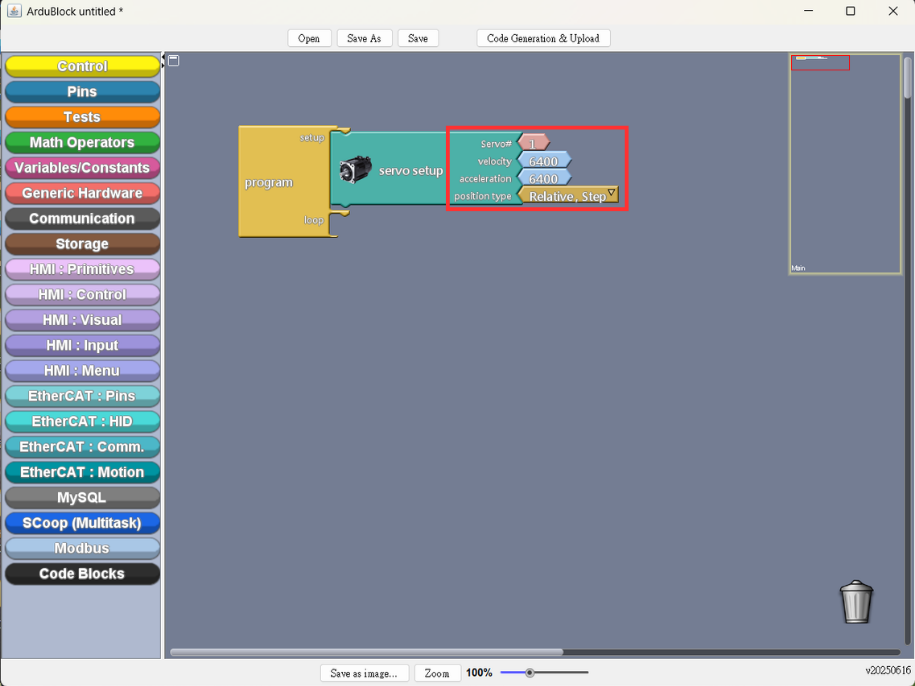
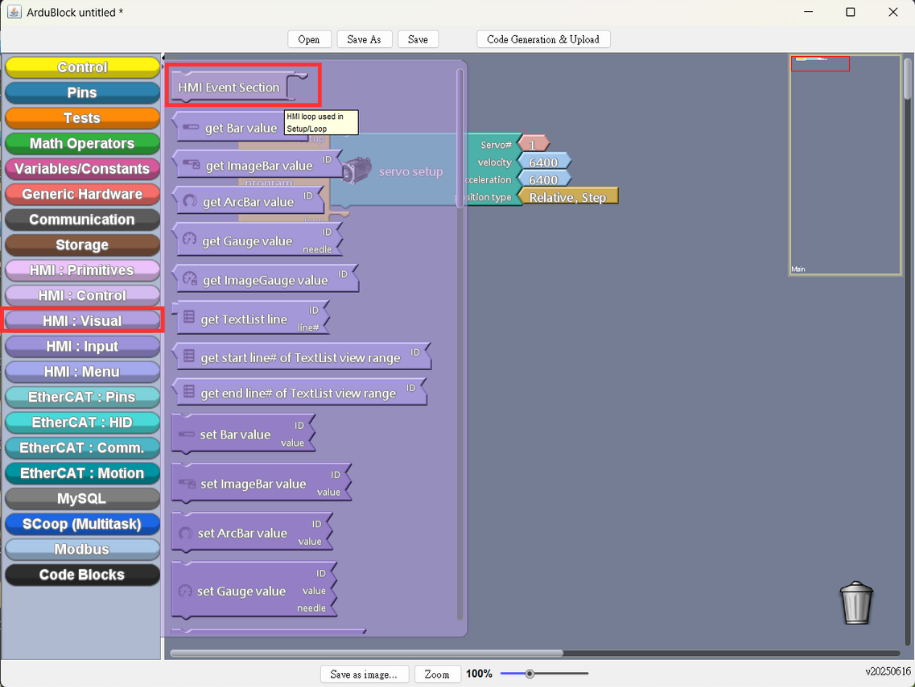
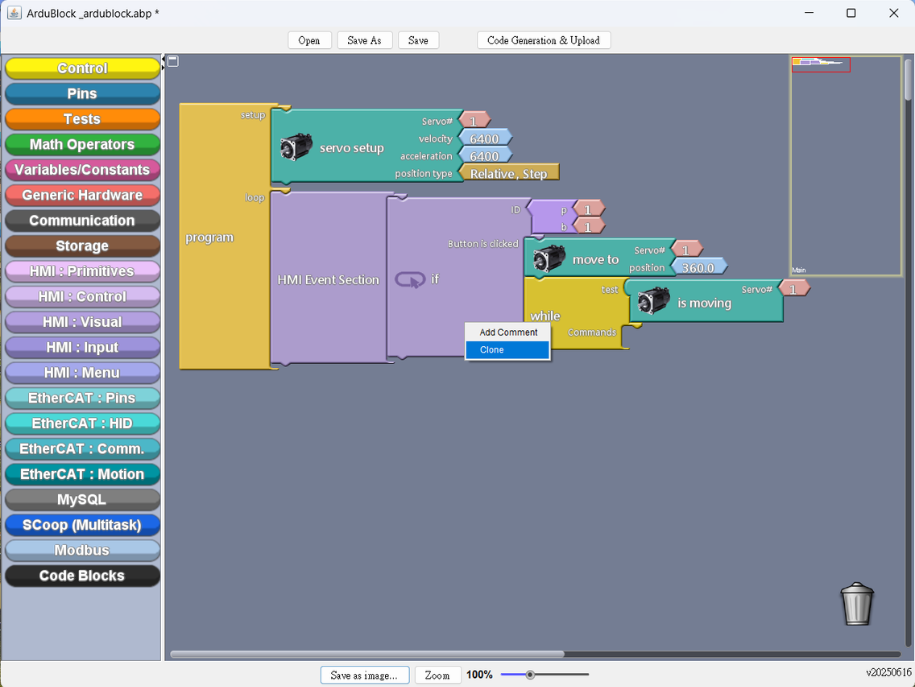
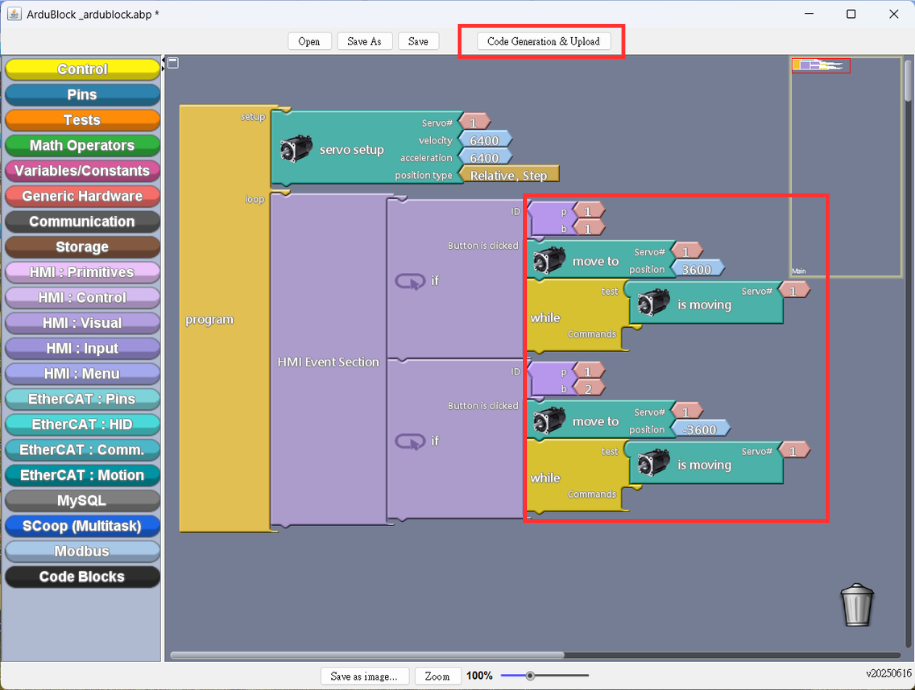
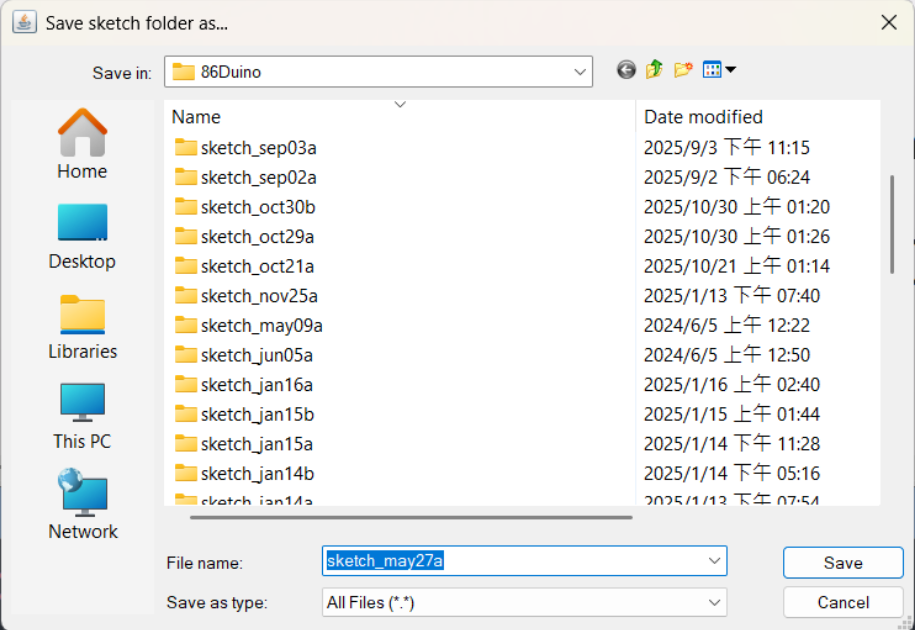
The implementation process can be divided into three main steps.

  1. First, use 86EVA to scan and configure the EtherCAT devices. This step ensures that all connected EtherCAT slaves are correctly detected and properly configured.
  2. Next, design the HMI interface using 86HMI Editor. The interface can include buttons, text, and other visual elements required for motion control.
  3. Finally, create the control logic using ArduBlock. By combining the EtherCAT configuration and HMI interface, the function can be completed and operated through the HMI.


Step 1 – 86EVA Configurator

  1. Set up the development board and port to be used in tool option
    Stepper Motor Control Example tips_pic
  2. Click the 86EVA Configuration Tool
    Stepper Motor Control Example tips_pic
  3. Click to Connect to scan the device
    Stepper Motor Control Example tips_pic
  4. Scanning Device
    Stepper Motor Control Example tips_pic
  5. Configure QEC-M-070T and QEC-R11MP3S-N devices in 86EVA network
    Stepper Motor Control Example tips_pic
  6. Set up the QEC-M-070T Parameters (As shown in the illustration)
    Stepper Motor Control Example tips_pic
  7. Set up the QEC-R11MP3S-N M1 in the servo mapping
    Stepper Motor Control Example tips_pic
  8. Set up the servo 1 parameters (As shown in the illustration)
    Stepper Motor Control Example tips_pic
  9. Back to 86EVA to click Code Generation
    Stepper Motor Control Example tips_pic
  10. Scanning is complete and click OK to confirm
    Stepper Motor Control Example tips_pic

Step 2 – 86HMI Editor UI Design

  1. Click the 86HMI Editor Tool
    Stepper Motor Control Example tips_pic
  2. Select the board and Click OK
    Stepper Motor Control Example tips_pic
  3. Edit Text: Label > Text (Type the text inside the field)
    Stepper Motor Control Example tips_pic
  4. Add control button: Button (p1b1) > Edit the button text (Type the text inside the field)
    Stepper Motor Control Example tips_pic
  5. Add control button: Button (p1b2) > Edit the button text (Type the text inside the field)
    Stepper Motor Control Example tips_pic
  6. Upload to Generate Example Content
    Stepper Motor Control Example tips_pic

Step 3 – ArduBlock Programming

  1. Click the ArduBlock Tool
    Stepper Motor Control Example tips_pic
  2. ArduBlock Work Area
    Stepper Motor Control Example tips_pic
  3. EtheCAT Motion Setup: EtherCAT.Motion > servo setup
    Stepper Motor Control Example tips_pic
  4. Setting the parameter (As shown in the illustration)
    Stepper Motor Control Example tips_pic
  5. Add HMI Visual Block: HMI.Visual > HMI Event Section
    Stepper Motor Control Example tips_pic
  6. Add Control Button: HMI.Control > if Button is clicked
    Stepper Motor Control Example tips_pic
  7. EtheCAT Motion Setup: add move to block
    Stepper Motor Control Example tips_pic
  8. Add Condition Block: while block
    Stepper Motor Control Example tips_pic
  9. EtheCAT Motion Setup: add is moving
    Stepper Motor Control Example tips_pic
  10. Right-click to clone the whole control block (As shown in the illustration)
    Stepper Motor Control Example tips_pic
  11. Set up the parameters, and upload to Generate Example Content
    Stepper Motor Control Example tips_pic
  12. Save draft (Please select the folder where you want to save it)
    Stepper Motor Control Example tips_pic
  13. Upload and compile the sketch
    Stepper Motor Control Example tips_pic

Demonstration Result

  1. Results Presentation
    Stepper Motor Control Example tips_pic

Featured Products QEC-M-070T:

  • EtherCAT MDevice Open-frame 7” LCD
  • Integrated EtherCAT MDevice on Real-time Dual-Core CPU
  • 86Duino Integrated Development Environment (IDE)
  • 7″ TFT LCD with Resistive Touchscreen (800×480)
  • High Reliability SLC eMMC Storage with HDMI Output for HMI
  • Industrial Operating Temperature -20 to +70°C / -30 to +85°C
  • Rich Interfaces: 3×LAN, 3×USB, RS232/485, CAN, SPI, I2C, Arduino-Compatible GPIO
  • Built-in Voltage, Temperature, and System Status Monitoring

Featured Products QEC-RXXMP3S:

  • Support Drive Profile with CiA402 and G-code
  • 3 stepper motors (2-phase bipolar stepper motor)
  • Drive current up to 4.84A, peak 5.0A (Adjustable by Switch)
  • Encoder interfaces (A, B, Z), differential
  • Automatic current reduction when the motor is not moving
  • Internal Monitoring Hardware Information
  • EtherCAT Conformance test tool verified
  • Operating Temperature -20 to +70 °C

For more information or to request a sample, please email us at info@icop.com.tw, contact your nearest ICOP Branches, or get in touch with our Worldwide Official Distributor.

Δ