A PHP Error was encountered

Severity: Notice

Message: Undefined index: HTTP_ACCEPT_LANGUAGE

Filename: front/Model_main.php

Line Number: 34

Backtrace:

File: /var/www/html/application/models/front/Model_main.php
Line: 34
Function: _error_handler

File: /var/www/html/application/controllers/Home.php
Line: 1328
Function: init

File: /var/www/html/index.php
Line: 315
Function: require_once

ICOP Technology Inc. - [Technical tips] Run a modbus RTU example on NX8MM-35
cancel

[Technical tips] Run a modbus RTU example on NX8MM-35

April 24, 2025

This article will tell you how to run a modbus RTU example on NX8MM-35.
We used libmodbus to utilize the modbus function via 2x RS485 (1 modbus server & 1 modbus client on the same SBC) on NX8MM-35 under Yocto in this tips.


Key Features of Modbus:

  1. Master-Slave (Client-Server) Architecture: A master (client) device initiates communication, while slave (server) devices respond.
  2. Simple and Open Protocol: Easy to implement and widely supported in industrial systems.
  3. Multiple Communication Modes:
    • Modbus RTU (Remote Terminal Unit): Uses binary data format over serial communication (RS-232, RS-485).
    • Modbus ASCII: Uses human-readable ASCII characters for serial communication.
    • Modbus TCP/IP: Runs over Ethernet, allowing faster and more flexible networking.
 

Common Uses of Modbus:

  1. Monitoring and control of industrial equipment.
  2. SCADA (Supervisory Control and Data Acquisition) systems.
  3. Energy meters, temperature sensors, and other field devices

Tools you need:

  1. i.MX series products like NX8MM-35 / PN8M-090T / EBOX-IMX8MM
    • In this tips, we use NX8MM-35 as an example.
  2. Yocto Linux 4.0 sample image with libmodbus: Image / Guide
    • In the default recipe, you will need to add "libmodbus-dev" to IMAGE_INSTALL:append in local.conf before you build your own image.
  3. Modbus test tool sample code file: Download link
  4. NX8MM-35 with the test fixture connectoing 2xRS485

1. Boot up the board and compile the modbus test tool

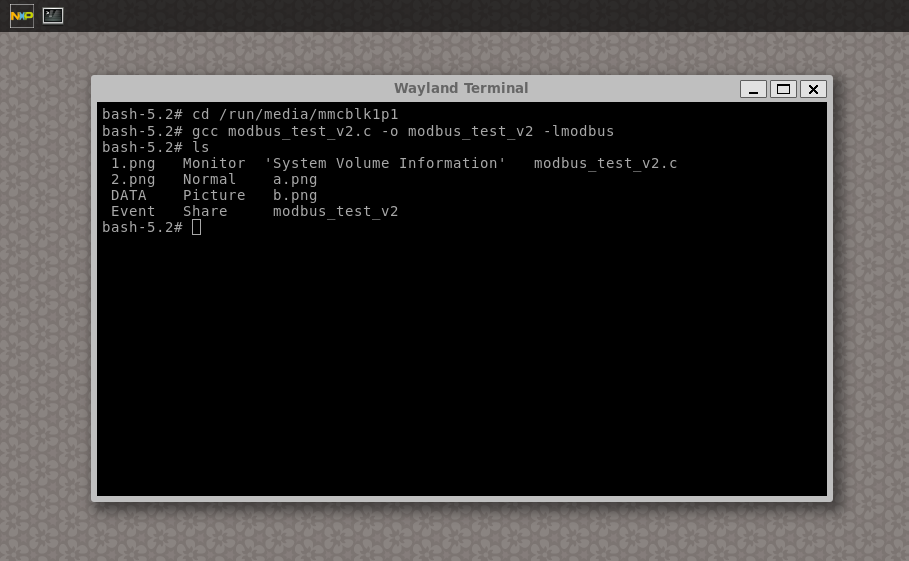
First, boot up the board, and plug in a USB disk which contains the modbus test tool sample code file and open the terminal.

  1. Access the USB disk and input the code below:
     
     $ gcc modbus_test_v2.c -o modbus_test_v2 -lmodbus 
  2. Move the compiled application to the your appointed file in the system and access it (In this case, we make a file called modbustest.)
     
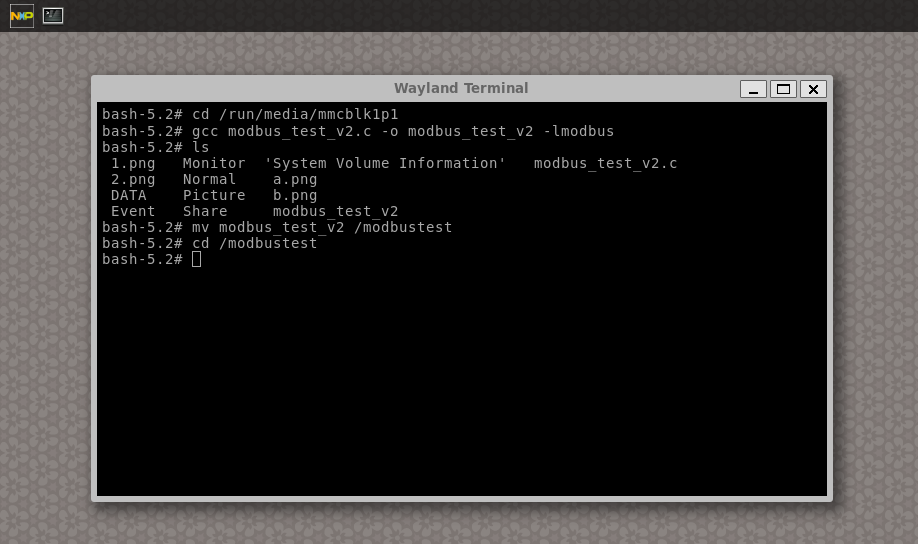
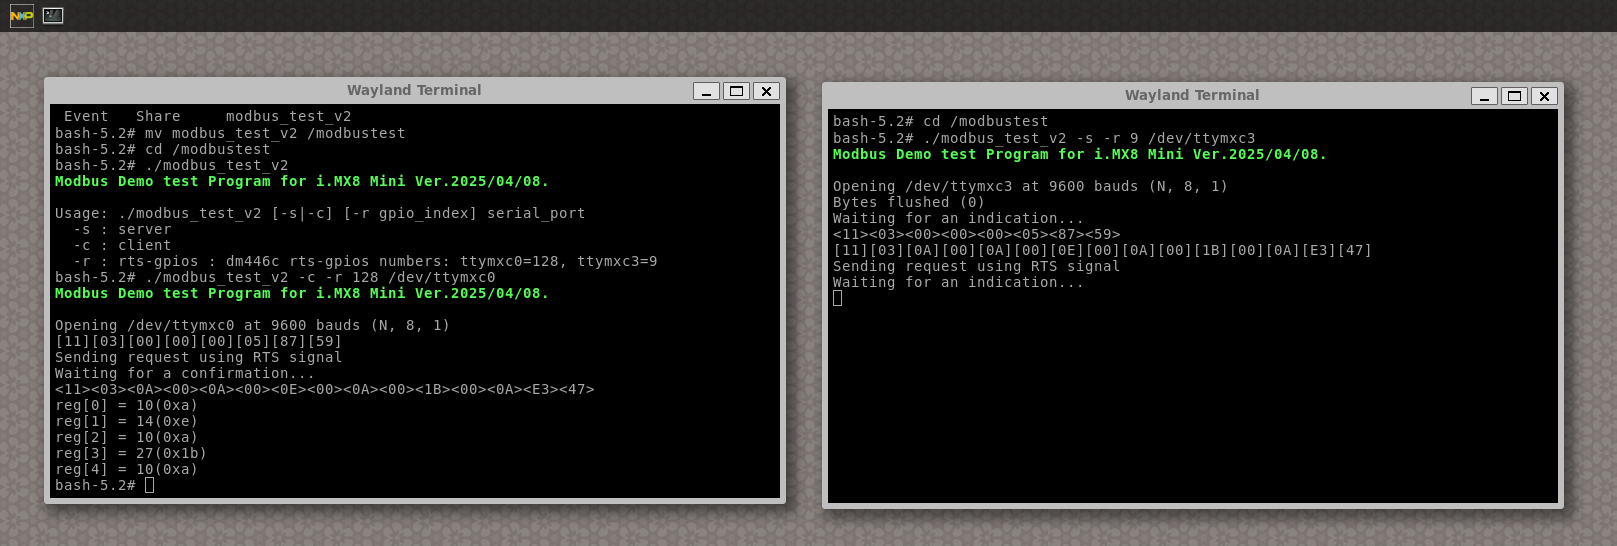
     $ mv modbus_test_v2 /modbustest
     $ cd /modbustest

Use the command below to check the function description:

 $ /.modbus_test_v2 

 Usage: ./modbus_test_v2 [-s|-c] [-r gpio_index] serial_port
 -s : server
 -c : client
 -r : rts-gpios : dm446c rts-gpios numbers: ttymxc0=128, ttymxc3=9

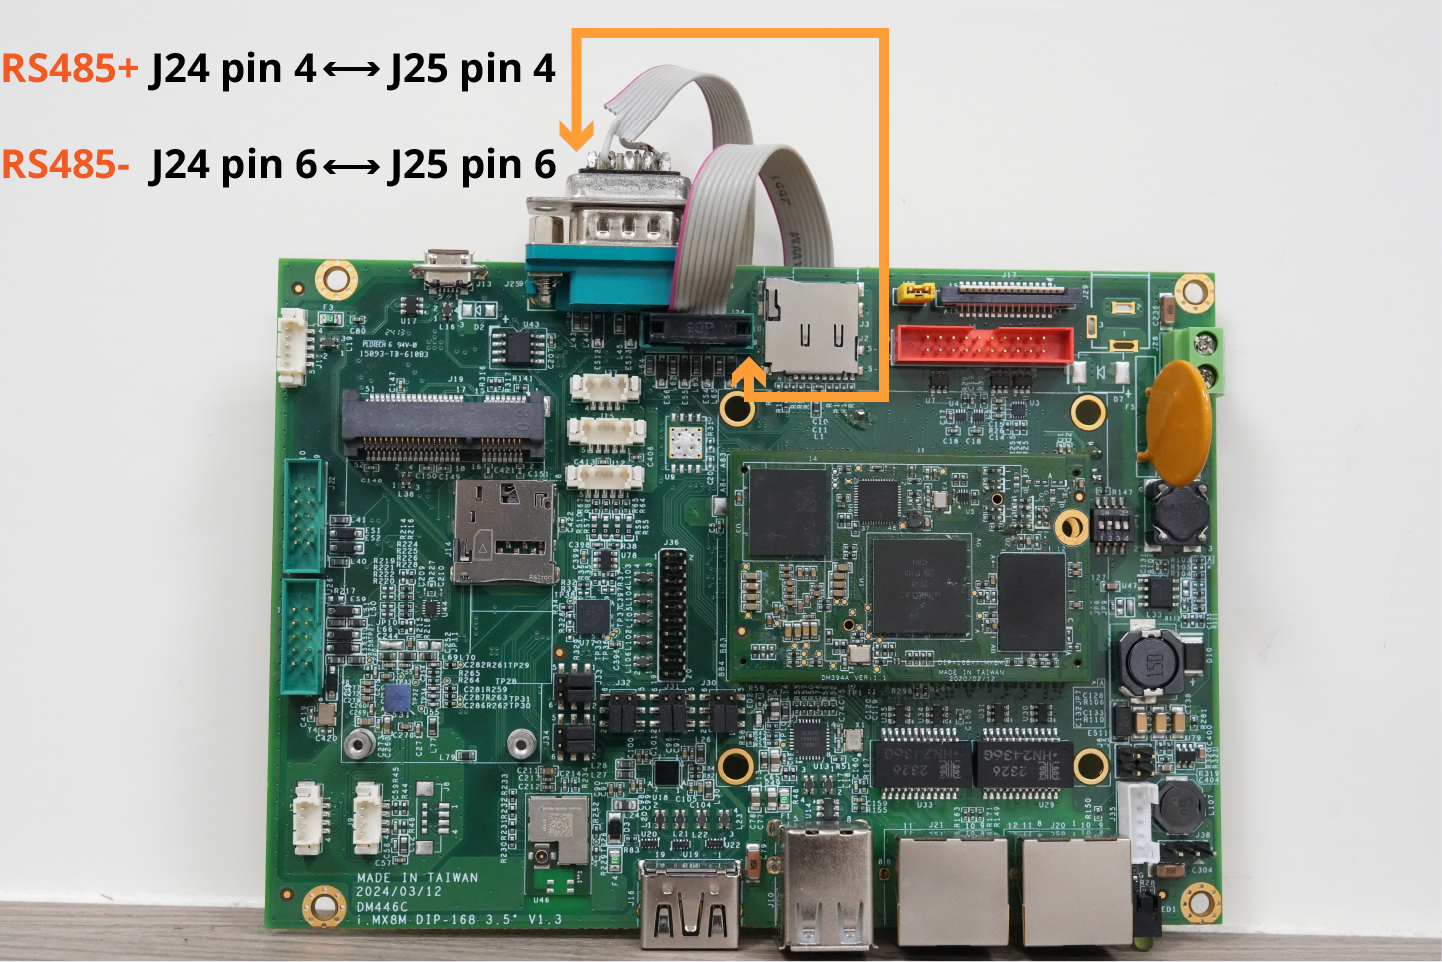
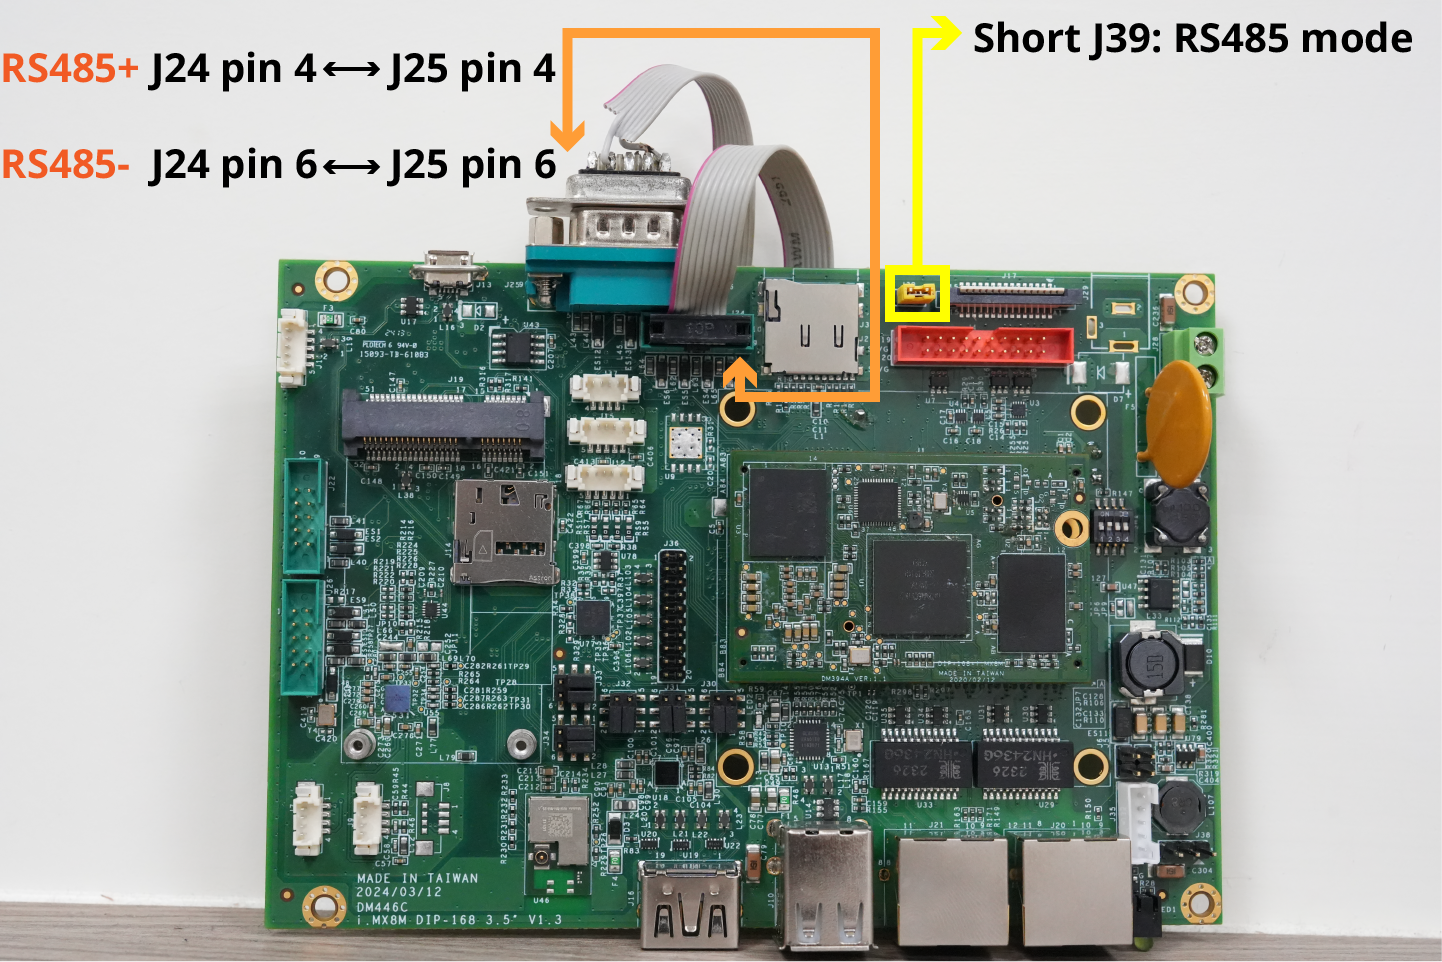
We use COM1 (ttymxc0/GPIO128) and COM4 (ttymxc3/GPIO9) on the NX8MM-35 for RS-485 communication, performing point-to-point Modbus RTU testing between the two ports.
(Be sure to short J39 to switch the COM port to RS485 mode.)

2. Start to perform Modbus RTU testing on NX8MM-35

  1. Open another terminal and input command below to set COM4 to server mode:
     
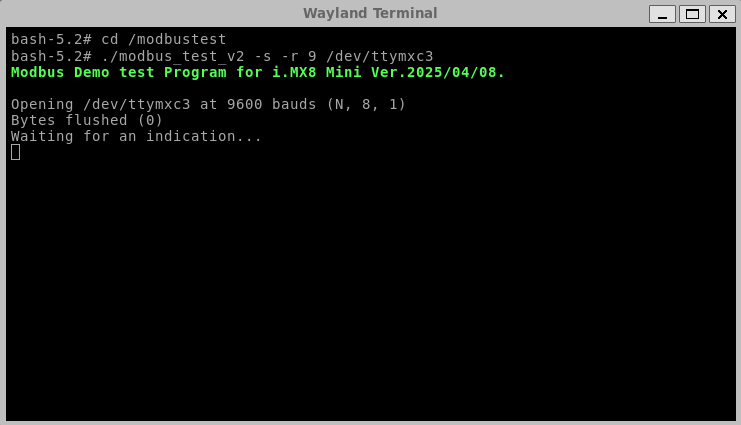
     ./modbus_test_v2 -s -r 9 /dev/ttymxc3
  2. Use the existing terminal to set COM1 to client mode and send the signal to server(COM4)
    ./modbus_test_v2 -c -r 128 /dev/ttymxc0

After executing the command above, the server (COM4) successfully receives the Modbus RTU signal from the client (COM1), marking the completion of the test.


nx8mm-35-front

Main Features of NX8MM-35:

  • i.MX 8M Mini Quad-core ARM Cortex-A53 up to 1.6/1.8GHz
  • Memory: Up to 4GB LPDDR4
  • Storage: Up to 64GB eMMC
  • Display: LVDS/HDMI interface
  • Camera: MIPI-CSI interface
  • Connectivity: GLANx2, USB x4, COMx4, i2c, SPI, GPIO,Touch, MiniPCIe with Sim Card holder and HD Audio.
  • Temperature range: -20°C to +70°C or -40°C to +80°C (Optional)

For more info and sample request, please write to info@icop.com.tw, call your nearest ICOP Branch, or contact our Worldwide Official Distributor.