


In many industrial network environments, devices require a static IP address to ensure they retain the same IP address after a system reboot, DHCP lease renewal, or network reconnection. Using a static IP address helps improve network stability and simplifies remote management, device communication, and system maintenance.
This guide demonstrates two methods for configuring a static IP address on Debian:
Please select the appropriate method based on your network environment:
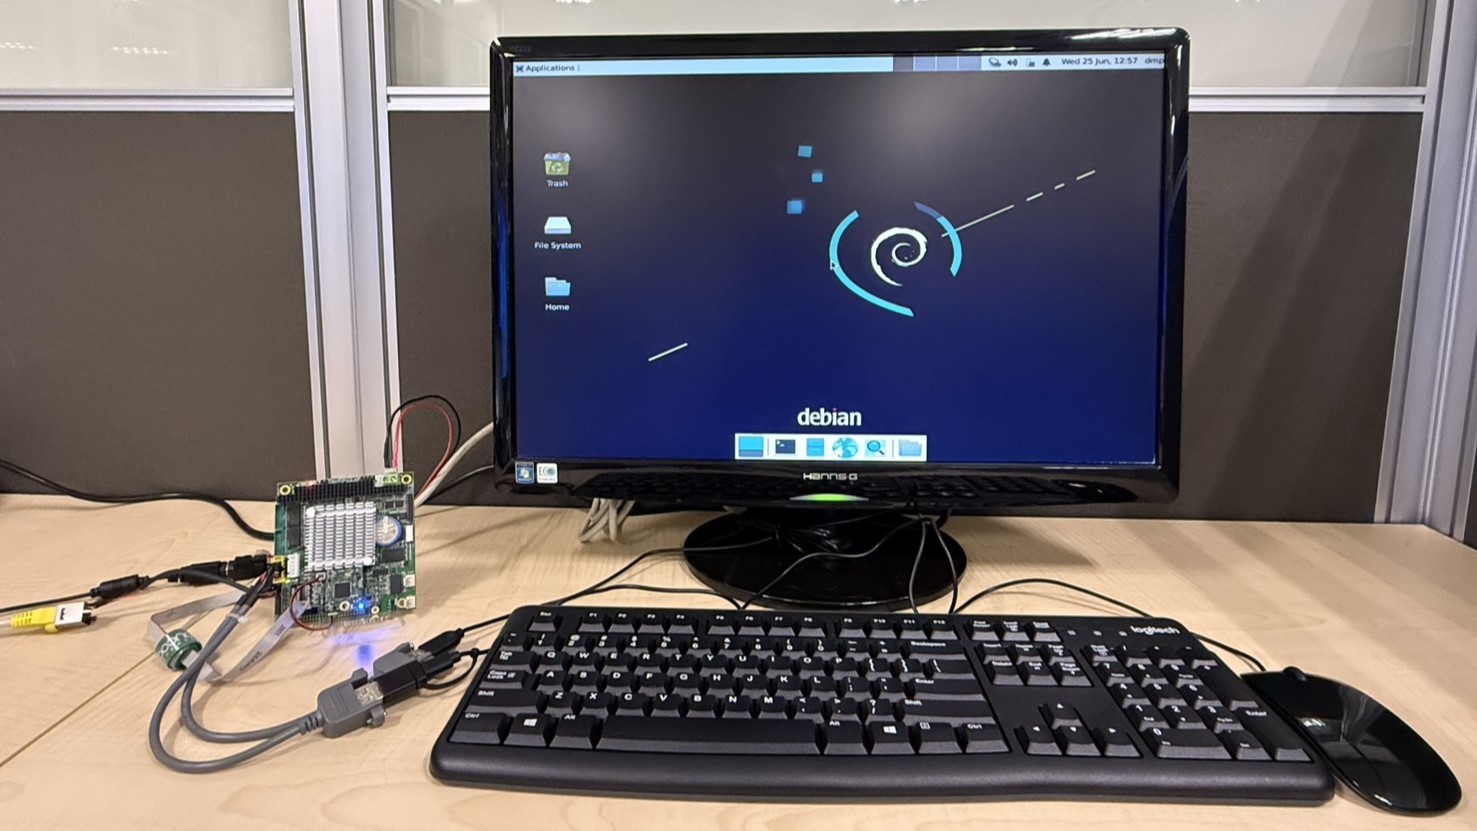
Before you begin configuring a static IP address, please prepare the following equipment and network environment:
Before configuring a static IP address, identify the network interface to be configured.
Open Terminal and enter the following command: ip link
The command lists all available network interfaces.
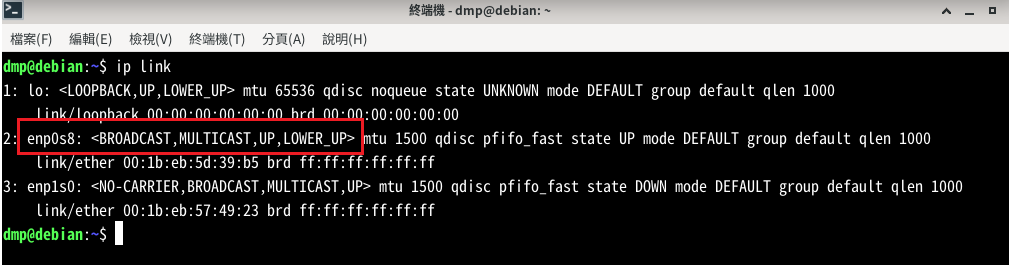
Locate the network interface with the status UP, LOWER_UP.
In this example, the network interface name is: enp0s8
Please verify the actual name based on your system.
Before configuring a static IP, check the current network settings assigned by DHCP.
Record the current IP address, gateway, and DNS server for reference.
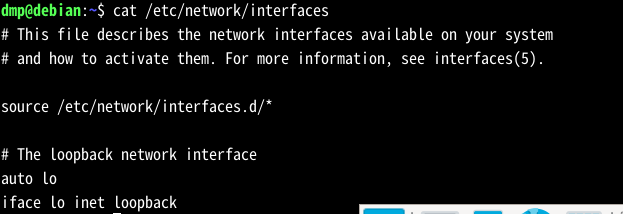
ip addr 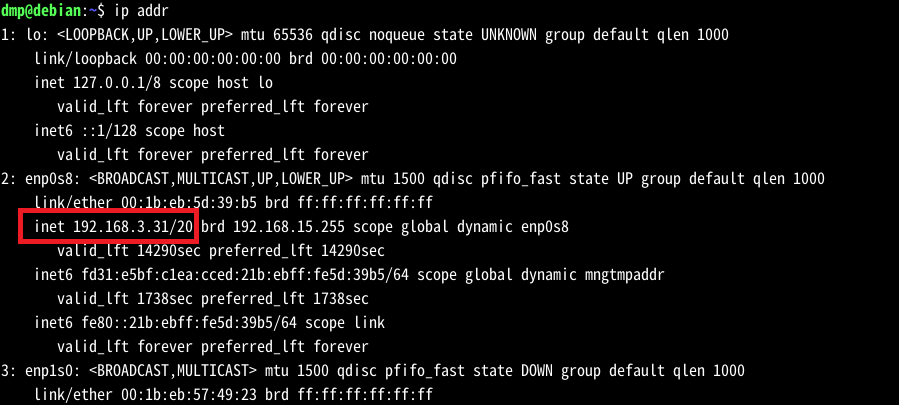
ip route 
cat /etc/resolv.conf  Record the current network information for the static IP configuration.
cat /etc/network/interfaces If DHCP Reservation is enabled on your network, no additional network configuration is required. Simply keep the network interface configured for DHCP.
Verification:
ip addrIf the IP address remains the same after each reboot, DHCP Reservation is working correctly.
If your network does not support DHCP Reservation, configure a static IP address manually.
Open the network configuration file:
sudo nano /etc/network/interfaces
Locate the configuration for your network interface (for example, enp0s8). If a DHCP configuration already exists, comment it out, then add the following static IP configuration:
auto enp0s8iface enp0s8 inet staticaddress 192.168.3.106gateway 192.168.0.9netmask 255.255.255.0dns-nameservers 192.168.9.20 192.168.0.7 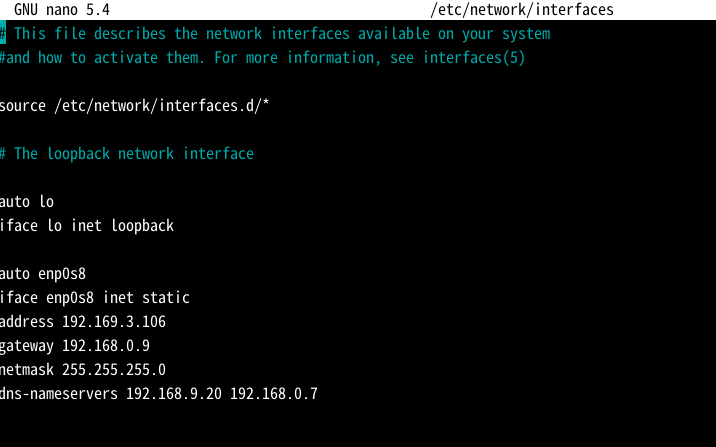
Note:
enp0s8 with your actual network interface name.
After saving the configuration file, restart the system by running sudo reboot to apply the new network settings.
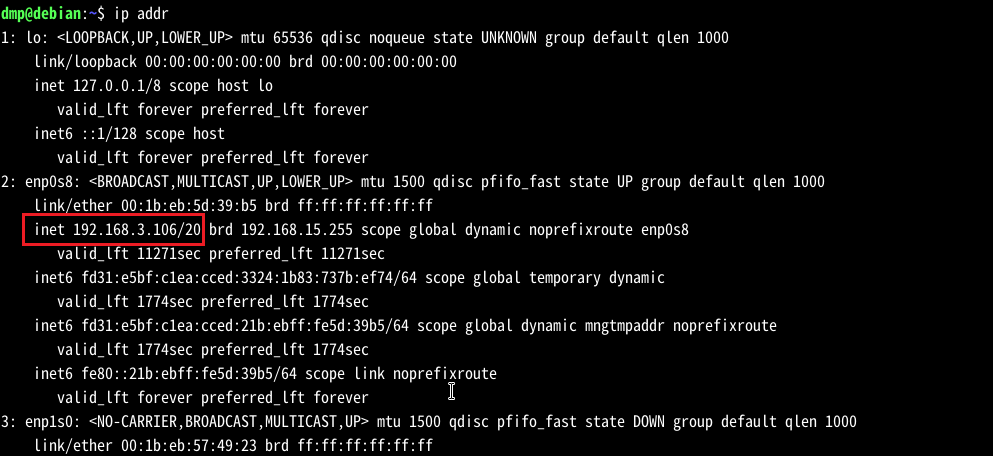
After restarting the system, verify the IP address by running the following command: ip addr
If the displayed IP address matches the configured static IP address, the static IP configuration has been applied successfully.
For more info and sample request, please write to info@icop.com.tw, call your nearest ICOP Branch, or contact our Worldwide Official Distributor.