A PHP Error was encountered

Severity: Notice

Message: Undefined index: HTTP_ACCEPT_LANGUAGE

Filename: front/Model_main.php

Line Number: 34

Backtrace:

File: /var/www/html/application/models/front/Model_main.php
Line: 34
Function: _error_handler

File: /var/www/html/application/controllers/Home.php
Line: 1328
Function: init

File: /var/www/html/index.php
Line: 315
Function: require_once

ICOP Technology Inc. - [Technical tips] EBOX-336x Series, Using a Mini Box PC to open XPe
cancel

[Technical tips] EBOX-336x Series, Using a Mini Box PC to open XPe

March 29, 2023

This article provides three boot methods for different storage devices.
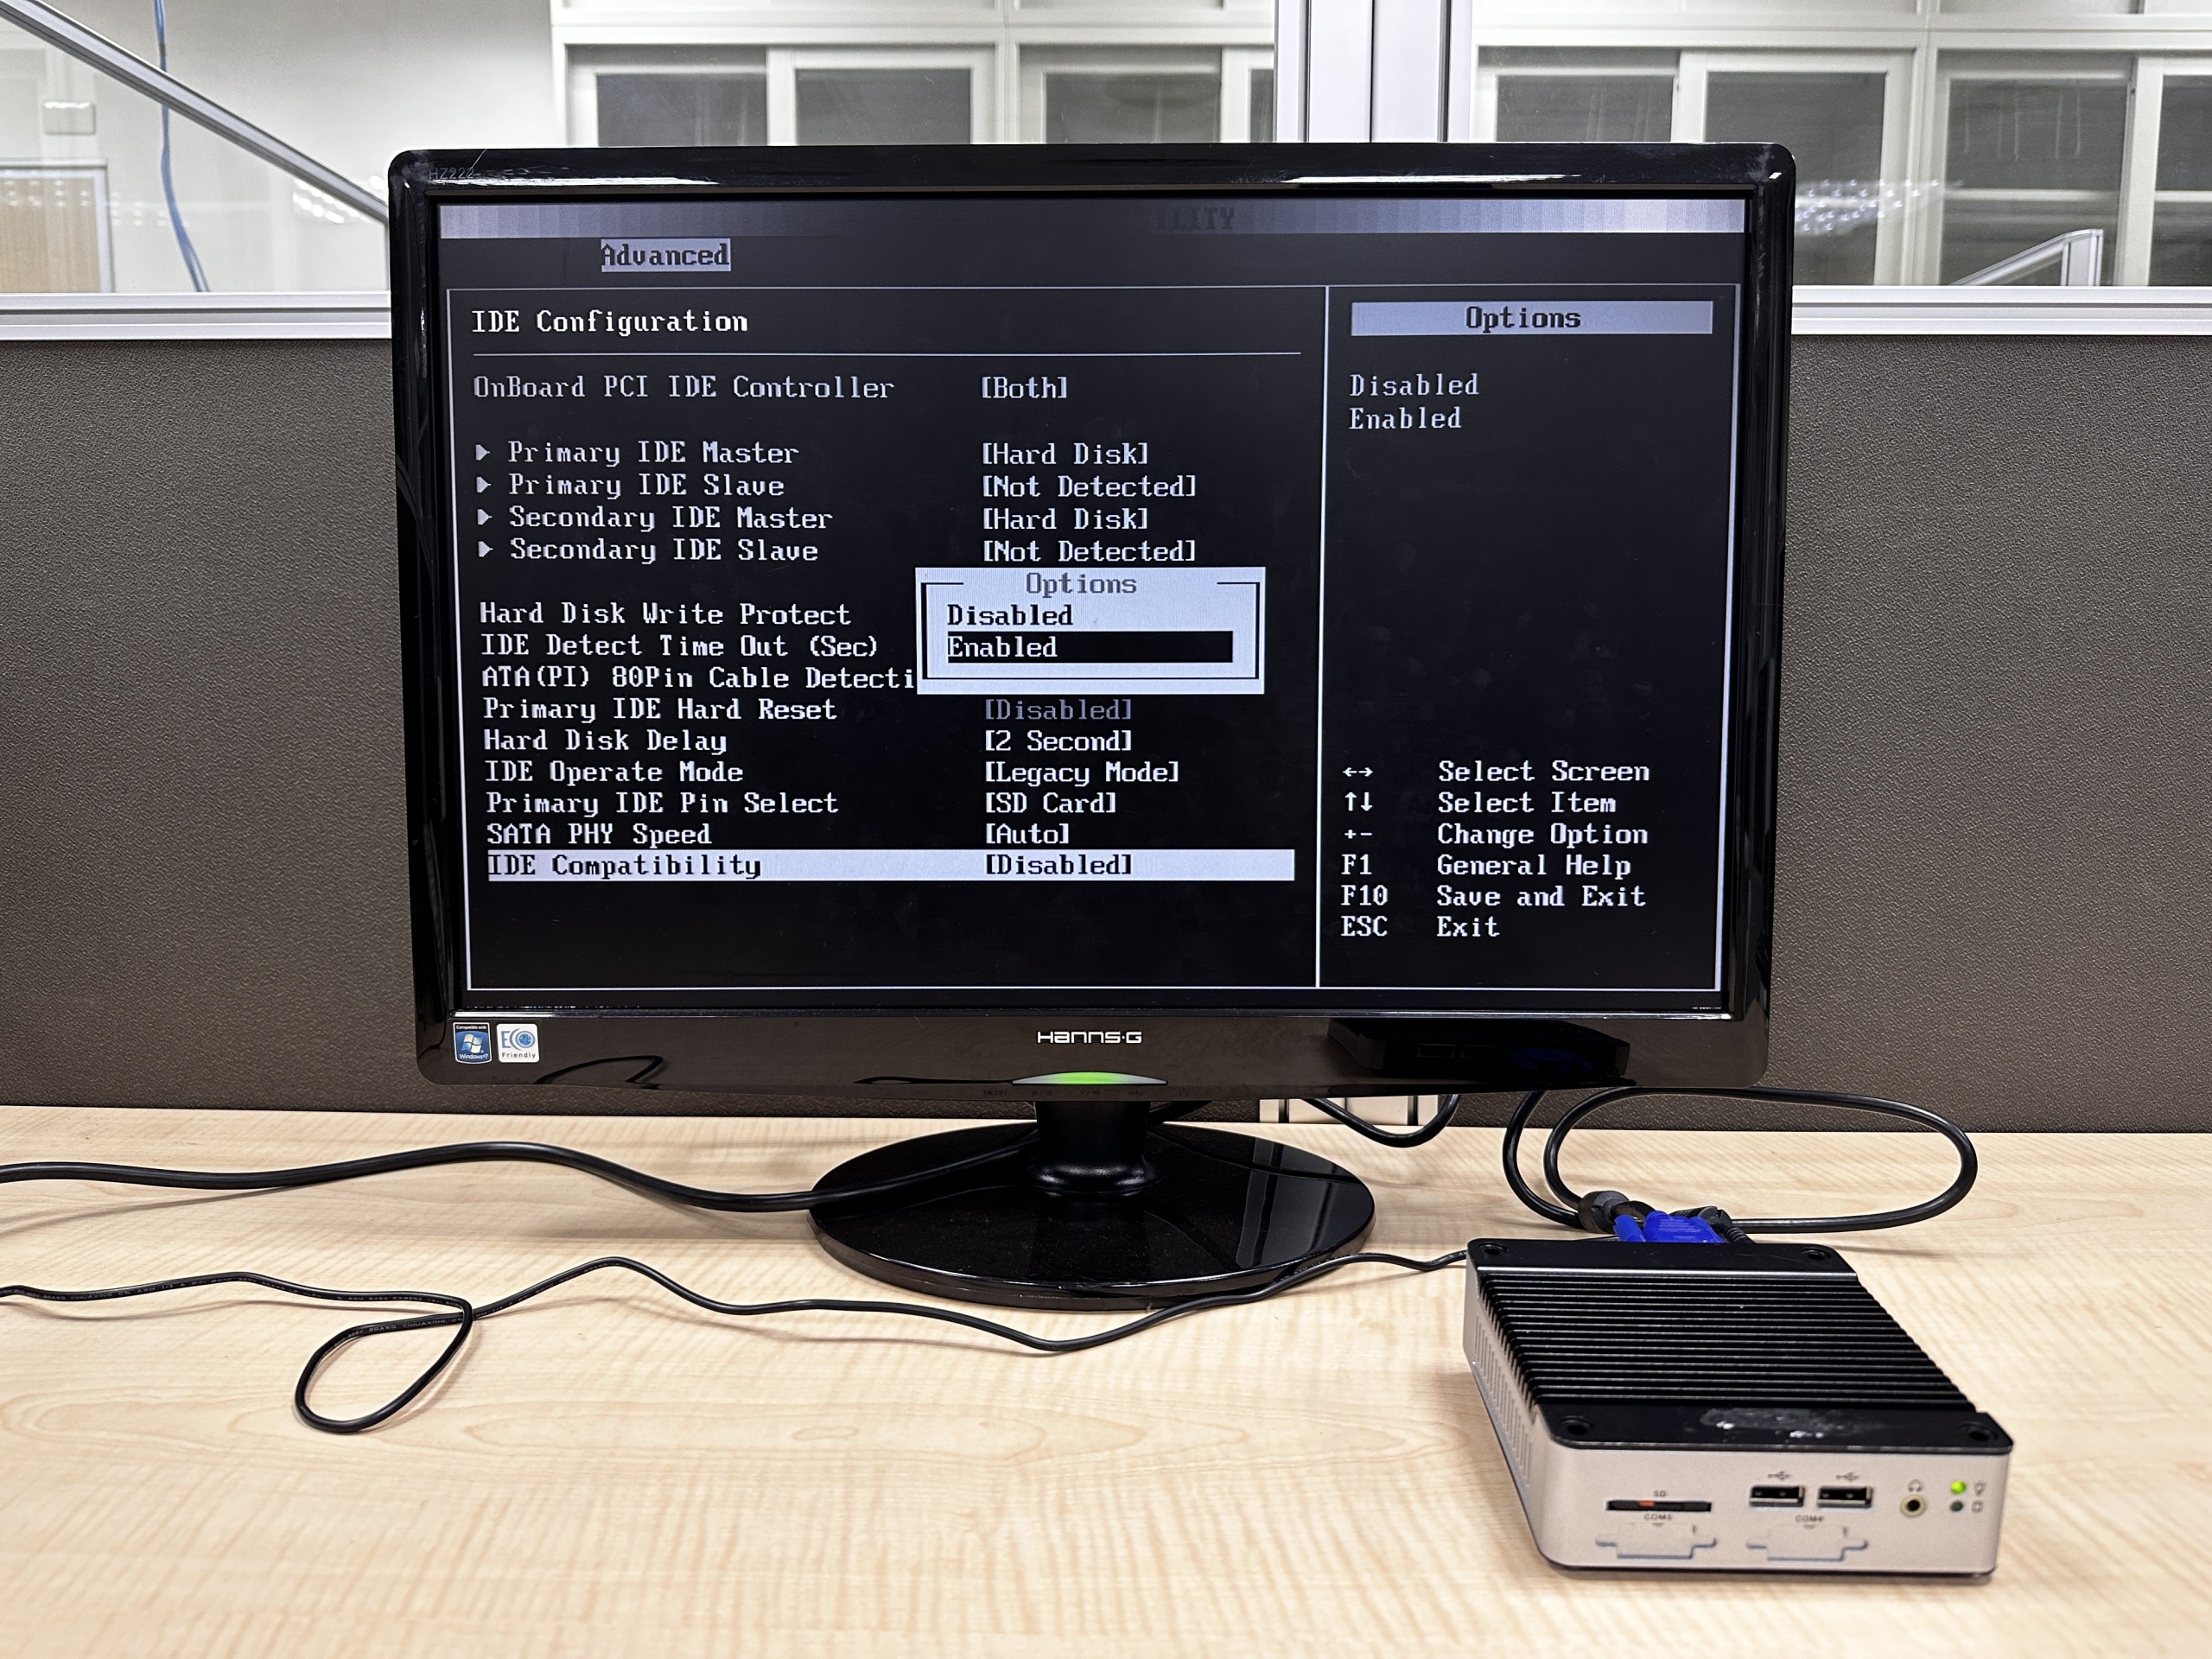
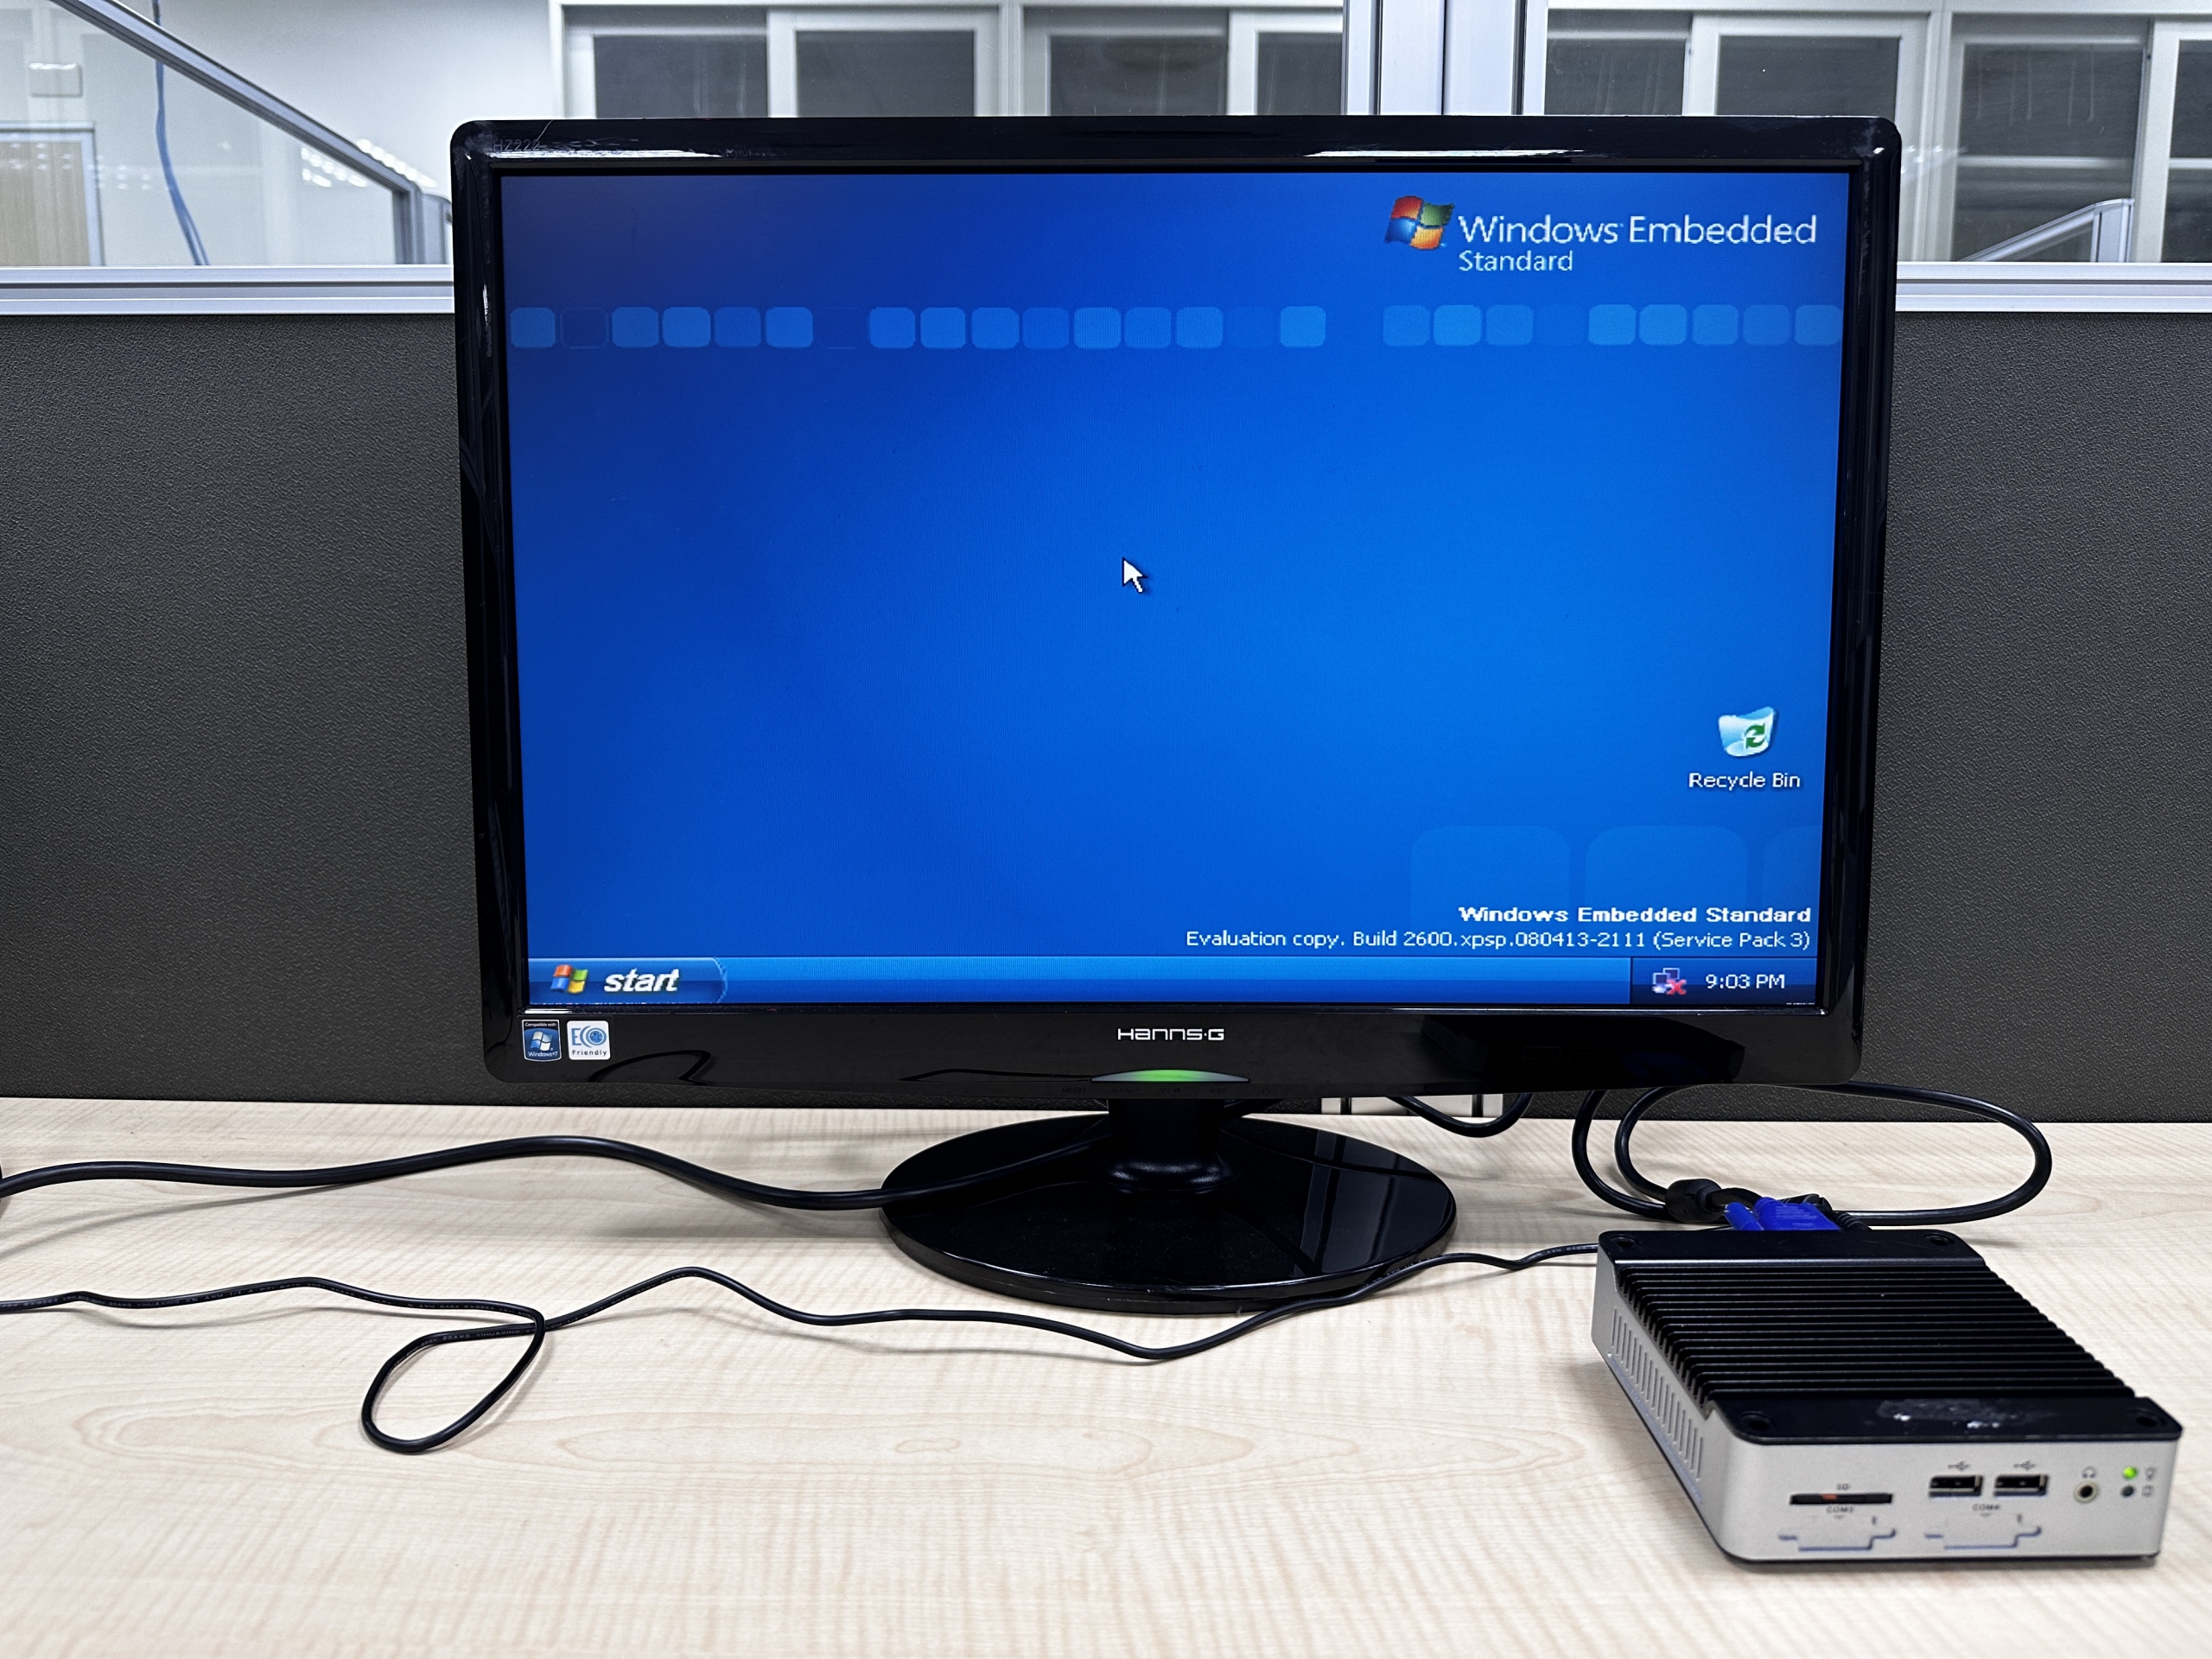
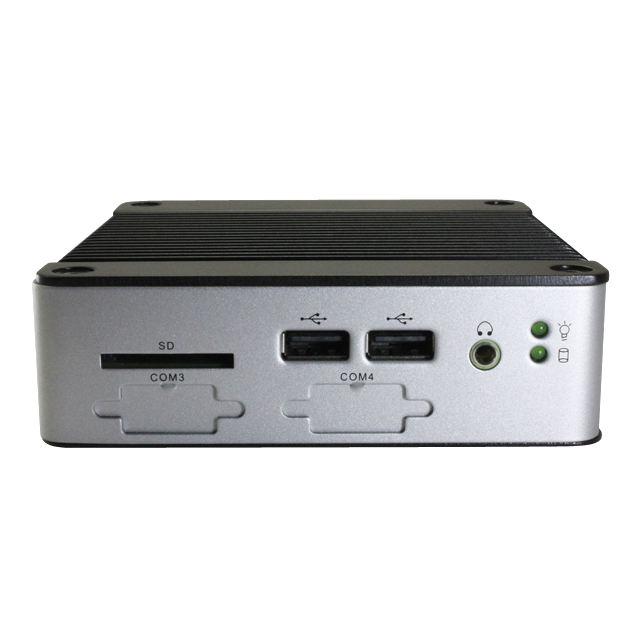
Target Device: EBOX-336x Series

Tip41Banner

Solid-state disk (SSD):

SSDs are a type of storage hard drive that functions similarly to traditional hard drives in that they use flash memory to store data and access it digitally, while traditional hard drives (HDDs) use spinning discs with cantilevers across them to read each data segment. Because SSDs don't have to find data through spinning discs, they can provide you with the read speed almost equivalent to instant boot.

Installing Windows XPe for different storage and conditions:

  1. Install XPe in SATA/ IDE storage by using external SATA/ IDE reader
  2. Install XPe in SATA/ IDE storage that already assembled inside device
  3. Install XPe in SD or CF Card as main storage

Operation Video


Method A: Install XPe in SATA/ IDE storage by using external SATA/ IDE reader

  1. Use other Windows PC to format the SATA/IDE DOM to NTFS.
    Note: By this method, you will need the SATA/ IDE storage reader to format and transfer the data to the SATA or IDE storage.
    Transfer
  2. Unzip and copy all of the files you had downloaded to the NTFS format SATA/ IDE storage.
  3. Download XPe demo Image files from DMP’s support page or link as below.
    XPe demo Image: EBOX-333x, 336x, DIN PC-333x, 336xSeries
  4. Put the storage in EBOX or DIN PC unit and turn the power on to run the first boot. It will take about 5 ~ 10 minutes to boot, and the XPe demo OS will be valid for 120 days after booting.
    XPeInstalling

Method B: Install XPe in SATA/ IDE storage that already assembled inside device

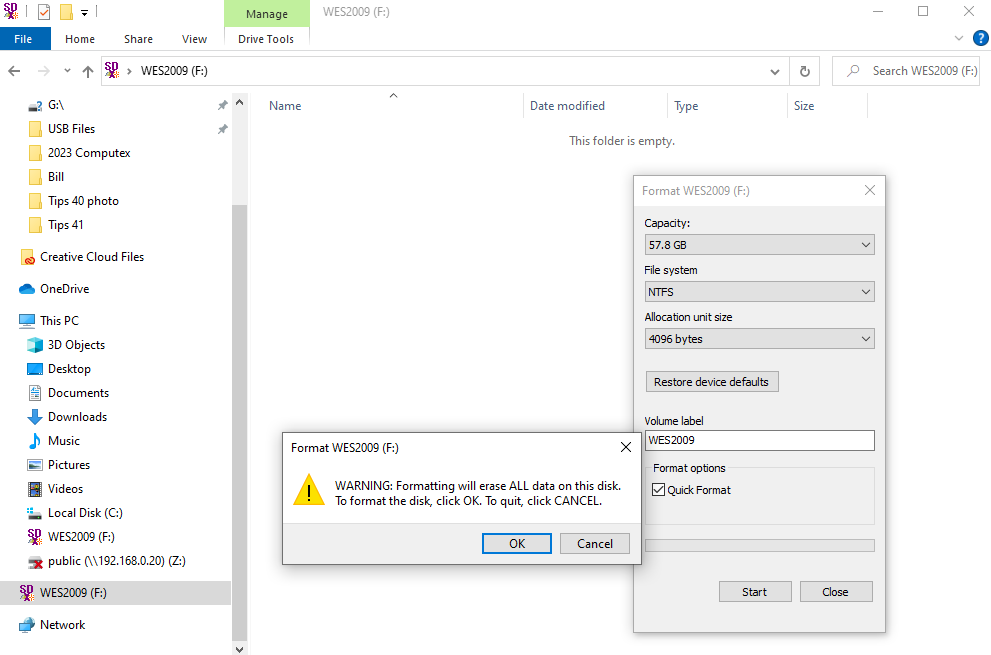
• Before doing this method, you have to prepare an SD or CF card which is Windows bootable and plug it into the EBOX that has installed SATA/IDE storage inside.

  1. Use SD or CF card with pre-installed Windows XP or XPe as 1st boot up storage and active EBOX or DIN PC, then to format the SATA or IDE storage to NTFS.
    Transfer
  2. Unzip and copy all of the files you had downloaded to the NTFS format SATA/ IDE storage.
  3. Download XPe demo Image files from DMP’s support page or link as below.
    XPe demo Image: EBOX-333x, 336x, DIN PC-333x, 336xSeries
  4. Unplug the SD/CF card and turn the power on to run the first boot on SATA/IDE storage. It will take about 5 ~ 10 minutes to boot, and the XPe demo OS will be valid for 120 days after booting.
    XPeInstalling

Method C: Install XPe in SD or CF Card as main storage

  1. BIOS Pre-setting: Enter BIOS→Advance path, IDE Configuration set the Standard IDE Compatible to “Enable”
    Note: For EBOX-3100-VGA and EBOX-3350EX Series, BIOS setting is not required.
    StandardIDE
  2. Use other Windows PC and format the SD or CF Card to NTFS.
    Format
  3. Unzip and copy all of the files you had downloaded to the NTFS formatted SD or CF Card.
  4. Download XPe demo Image files from DMP’s support page or link as below.
    XPe demo Image: EBOX-333x, 336x, DIN PC-333x, 336xSeries
  5. Put the SD or CF Card in EBOX unit and restart to run the first boot. It will take about 5 ~ 10 minutes to boot, and the XPe demo OS will be valid for 120 days after booting.
    XPeInstalling

Result:

Result
eb-3362-l2c2

Main features of EB-3362-L2C2:

  • DM&P 32-bit x86 Vortex86DX3 Dual Core 1.0GHz SoC
  • 2GB DDR3-1600MHz onboard
  • SD card slot x1 (SD, SDXC), 1 Gbps LAN x1, 10 / 100 Mbps LAN x1, USB x4 (Front x2, Rear x1, Internal x1), Line out x1, RS-232 x2
  • Auto Power On support
  • PXE Diskless boot support
  • DC +8V ~ +24V
  • Operation Temperature: 0~+60°C

For more info and sample request, please write to info@icop.com.tw, call your nearest ICOP Branch, or contact our Worldwide Official Distributor.

Δ