cancel

[Technical tips] EB-336x Series Install Debian 11 and Build Nginx Web Server

January 02, 2024

This article will show you how to Build a Nginx Web Server under Debian 11.

Tips52Banner

What is Nginx?

Nginx is an open source web server that can be used for a variety of web services, including HTTP servers, reverse proxy servers, mail proxy servers, etc. Nginx was designed to handle the demands of highly concurrent, high-traffic web services.

What is Web Server?

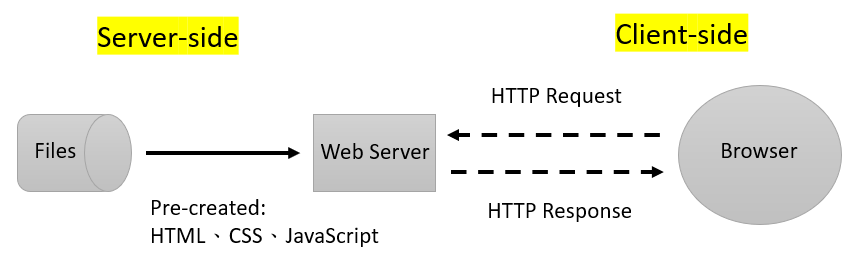
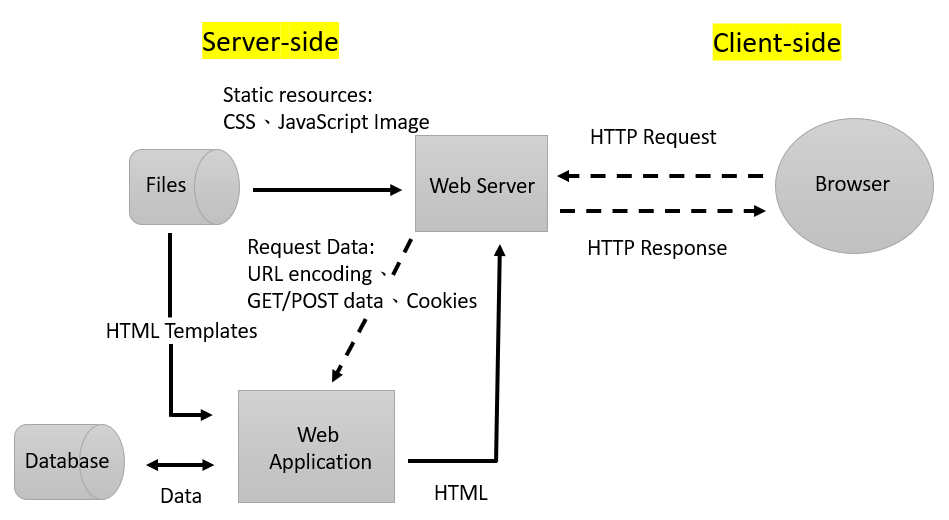
The term web server has two meanings:

  • A computer is responsible for delivering web pages, mainly constructed in various programming languages, to a client (usually a web browser) via the Hypertext Transfer Protocol (HTTP).
  • A server program that provides web pages.

Web Server Framework

  • Static Site
    Static Site
  • Dynamic Site
    Dynamic Site

Tips to prepare in advance


Installation Procedure Video


Use tool Rufus to create Debian 11 installer

  1. Click Rufus to activate
  2. Connect USB drive to PC
  3. Select debian-11.4.0-netinst.iso Image
    SelectImage
  4. Click start
  5. ISOHybrid image detected, select Write in ISO Image mode and click OK.
    listdisk
  6. A warning message appear, click OK to continue with this operation.
    listdisk
  7. Remove USB drive after Debian 11 installer created.

Install Debian 11 on EBOX

  1. Select Graphical Install
    Select Graphical Install
  2. Select a language
    Select a language
  3. Select your location and click continue
    Select your location and click continue
  4. Set debian as Hostname
    Set debian as Hostname
  5. Click continue and skip domain name
    Click continue and skip domain name
  6. Set up user name
    Set up user name
  7. Click continue and skip root and password
    Click continue and skip root and password
  8. Select use entire disk
    Select use entire disk
  9. Select the storage to install
    Select the storage to install
  10. Select Yes and click continue to install GURB boot loader
    Select Yes and click continue to install GURB boot loader
  11. Debian 11 installation completed
    Debian 11 installation completed

Nginx Server installation

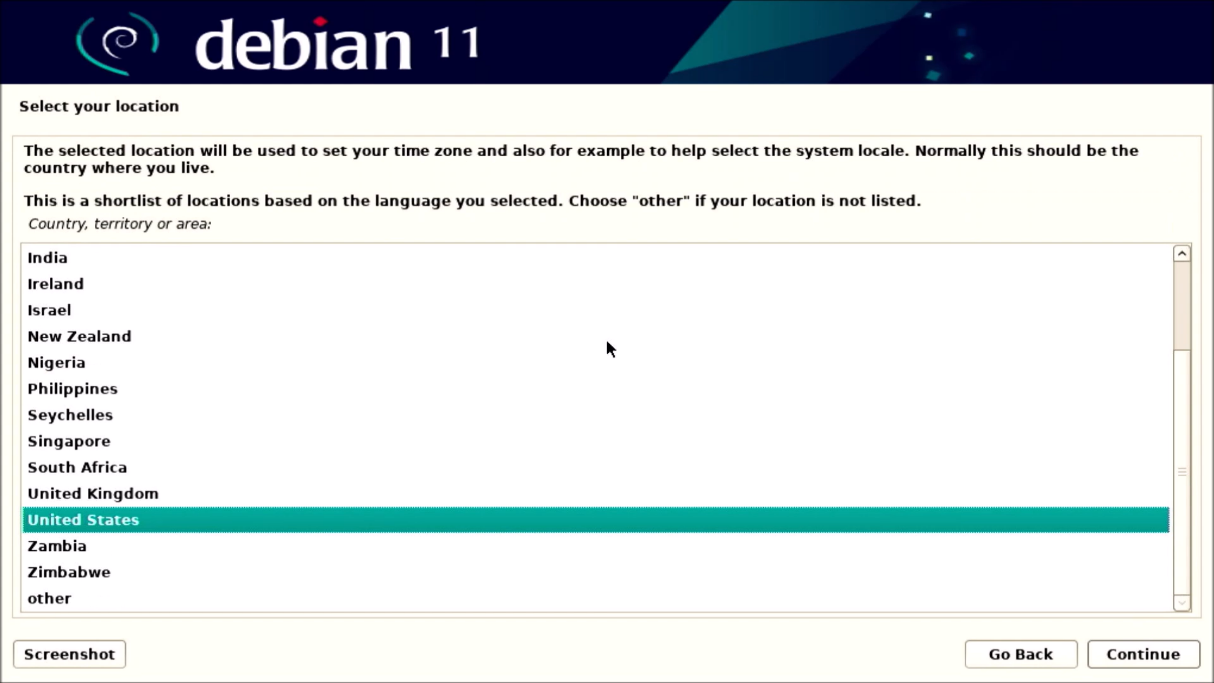
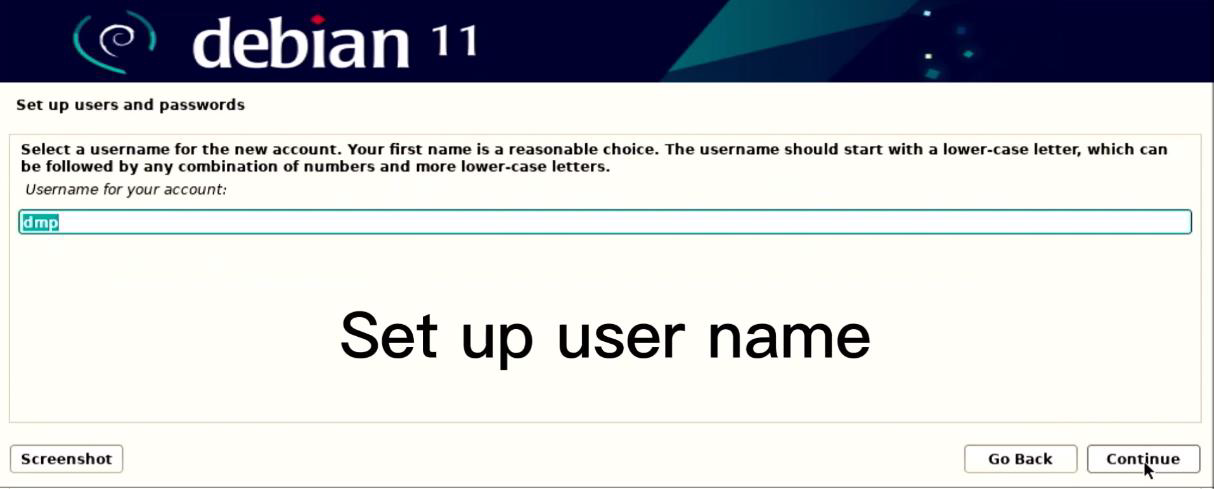
Step1: Reboot EBOX with internet connected, then enter Debian 11 desktop

  • Click terminal and Install Nginx Server by executing command
  • Run command:
    $sudo apt update
    $sudo apt upgrade
  • To install Nginx server, execute
  • Run command:
    $sudo apt install nginx
  • By default, the Nginx server will start on Debian 11 and it can be verified with the netstat command/ss command and ps command
  • Run command:
    $ ps aux | grep nginx
    $ pgrep nginx
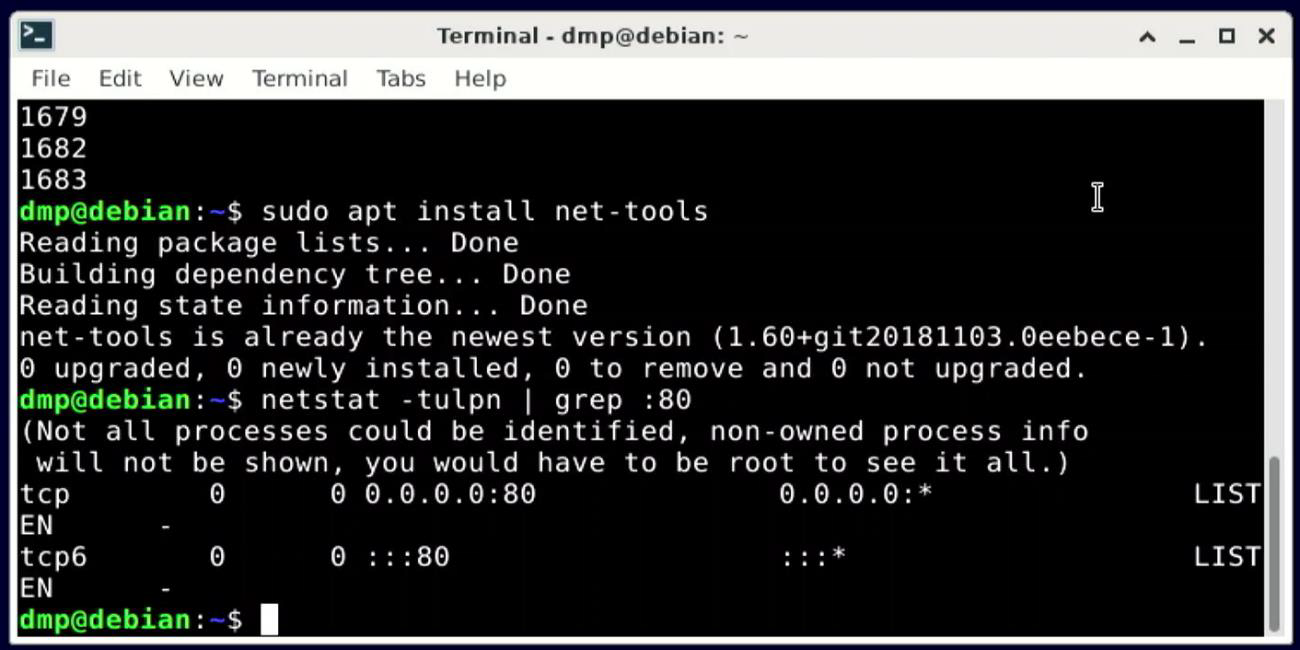
    $ sudo apt install net-tools
  • Use the netstat command as follows to verify if port 80 is open
  • Run command:
    $ netstat -tulpn | grep :80

    Run command

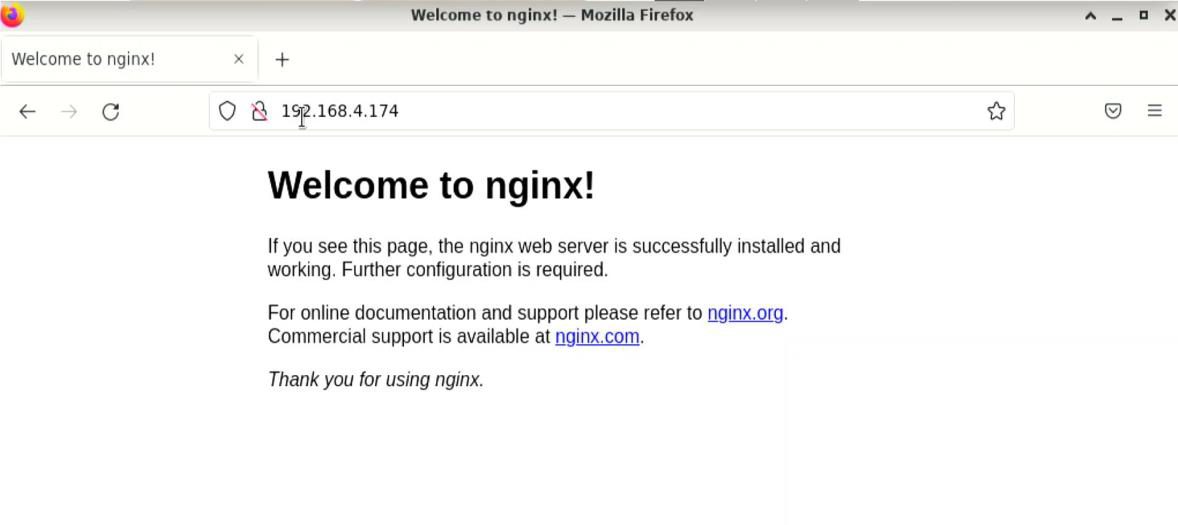
Step2: Test the Nginx Sever
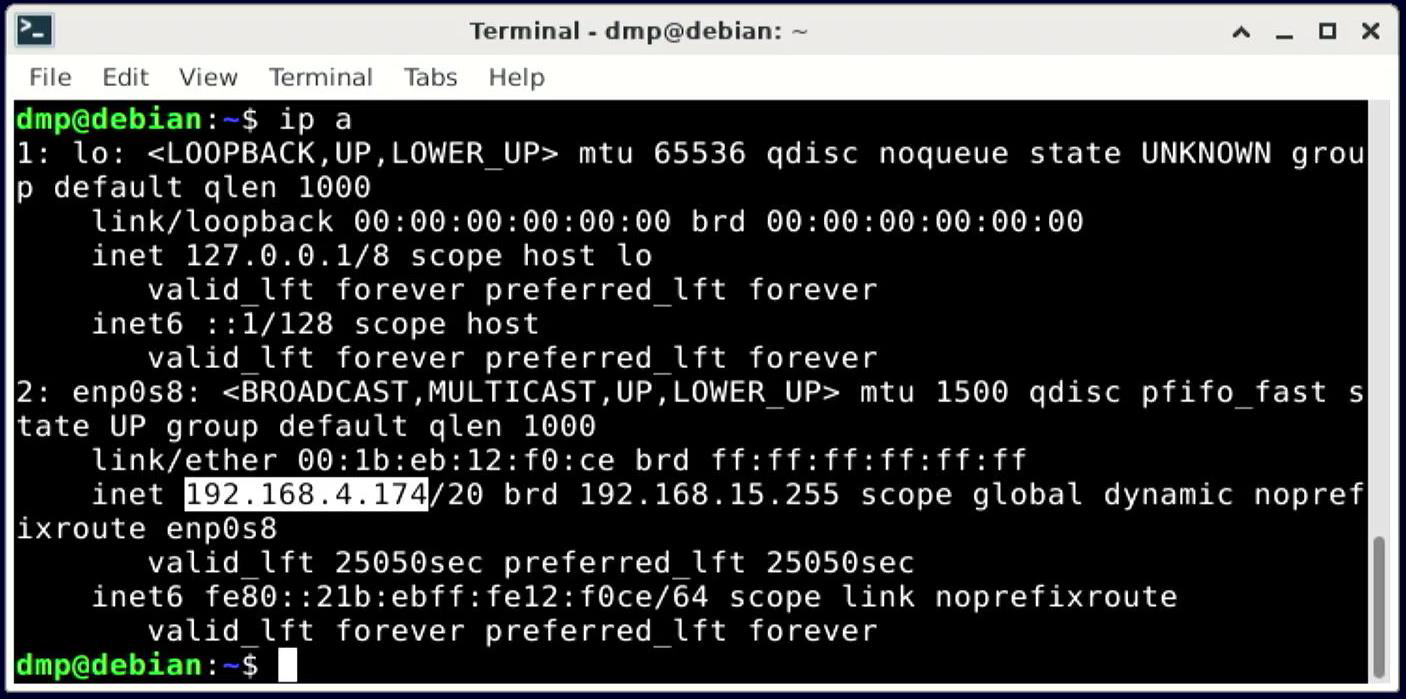
  • Open up a web browser and type url: http://your-domain/
  • Or find the public IP address using the ip/ifconfig Run command:
    $ ip a

    IP address
  • Open web broswer and enter http://your-domain/ or your IP address directly.
  • Enter IP address: http://192.168.4.174
  • If you see below page, the nginx web server is successfully installed and working.
    successfully installed

Step3: Configure Nginx Server
In Nginx, all HTML, CSS and Image files are stored by default in the /var/www/html directory, known as the web server's root. The default directory can be modified in the /etc/nginx/sites-enabled/default config file. User can edit it with nano command.

  • Execute following vim command/nano command to setting the web server default file
  • Run Command:
    $ sudo nano /etc/nginx/sites-enabled/default

    The /etc/nginx/nginx.conf is your main nginx config file and /etc/nginx/sites-enabled/default is the default config file.
  • To create a Virtual Host named “dmpdemo”, execute:
  • Run command:
    $ sudo nano /etc/nginx/sites-available/dmpdemo
  • Input the code below in “dmpdemo”:
    server {
    listen 80;
    listen [::]:80;
    server_name dmpdemo;
    root /home/dmp/www;
    index index.html;
    location / {
    try_files $uri $uri/ =404;
    }
    }
  • Let the file synchronize with:
  • Run command:
    $ sudo ln -s /etc/nginx/sites-available/dmpdemo /etc/nginx/sites-enabled/
  • Remove the default file with:
  • Run command:
    $ sudo rm /etc/nginx/sites-enabled/default
  • Remove the default file with:
  • Run command:
    $ sudo rm /etc/nginx/sites-enabled/default
  • Establish the path for the web page location and create the webpage.
  • Run command:
    $ sudo mkdir ~/www
    $ sudo nano ~/www/index.html
  • Type the following website code to the index.html:
    <!DOCTYPE html>
    <html>
    <head>
    <title>Welcome to Icop Tech</title>
    <style>
        body {
            width: 35em;
            margin: 0 auto;
            font-family: Tahoma, Verdana, Arial, sans-serif;
        }
    </style>
    </head>
    <body>
    <h1>Welcome to ICOP Tech</h1>
    <p>This is a test for Nginx web server.</p>
     
    <p><em>Hello world.</em></p>
    </body>
    </html>
  • Press “Ctrl + O” to Write Out and “Ctrl +X” to exit; Reload Nginx server and re-start browser.
  • Run command:
    $ sudo systemctl reload nginx

    ReloadNginx

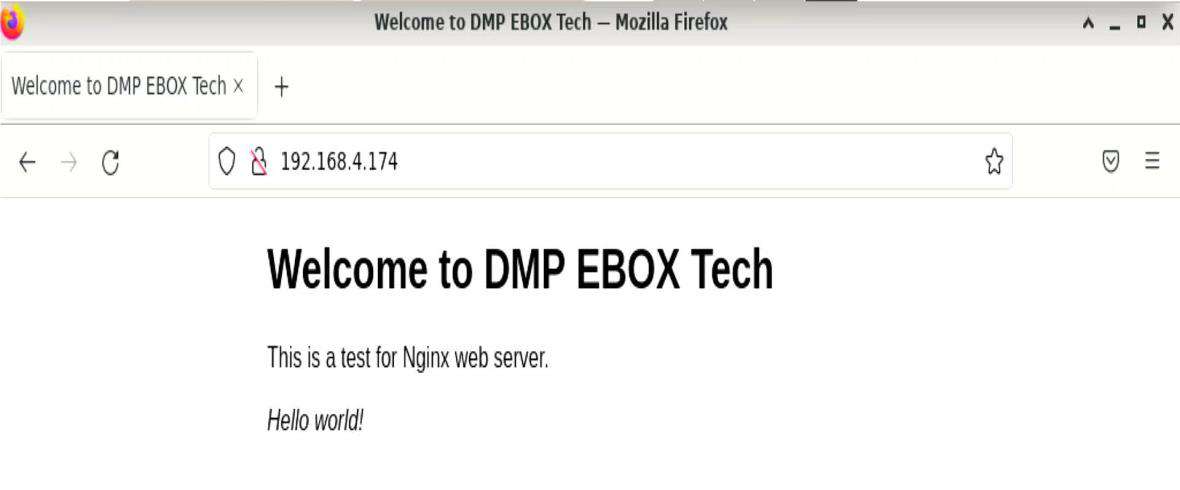
Enter the IP address to display the web page (~/www/index.html) from the Nginx web server. Web page is now successfully created!


eb-3362-lc2c2

Main features of EB-3362-L2C2:

  • DM&P 32-bit x86 Vortex86DX3 Dual Core 1.0GHz SoC
  • 2GB DDR3-1600MHz onboard
  • SD card slot x1 (SD, SDXC), 1 Gbps LAN x1, 10 / 100 Mbps LAN x1, USB x4 (Front x2, Rear x1, Internal x1), Line out x1, RS-232 x2
  • Auto Power On support
  • PXE Diskless boot support
  • DC +8V ~ +24V
  • Operation Temperature: 0~+60°C

For more info and sample request, please write to info@icop.com.tw, call your nearest ICOP Branch, or contact our Worldwide Official Distributor.