This article will tell you how to restore Yocto systems on our PN8M-090T based on using Windows and Linux OS.
ICOP provides not only the demo image, but also the recipe SDK; of you are interested in making your own version Yocto Linux, you could refer to our Wiki
In the tips below, we are utilizing the demo image of Yocto 3.0 for restoration.
This section will introduce how to write the image by Linux to the eMMC on the PN8M-090T step by step.
2. Turn on the host PC and unzip the image file in it.
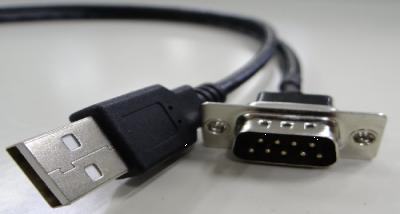
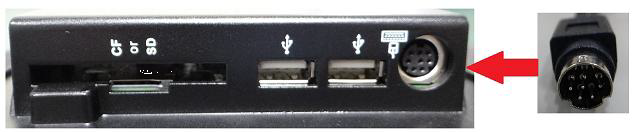
3. Connect the USB on CABLE-MINIDIN8P-30 to the host PC, but not connect to the PN8M-090T.
4. Open a terminal on the host PC and access the location you’ve put the image file and input:
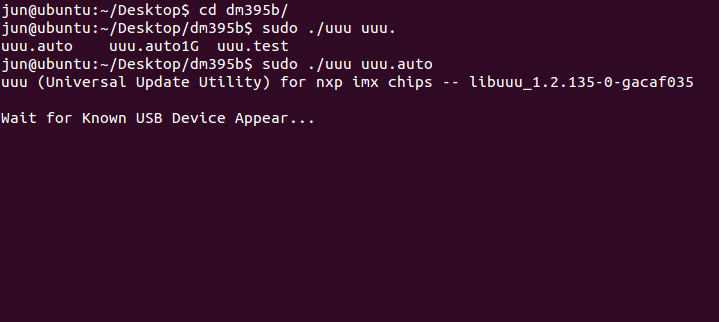
On Linux host PC, please use:
$ sudo chmod a+x uuu
$ sudo ./uuu xxxxx.auto
Using sudo chmod a+x uuu to enable uuu as executable command.
(xxxxxx depends on which audio chip has been used)
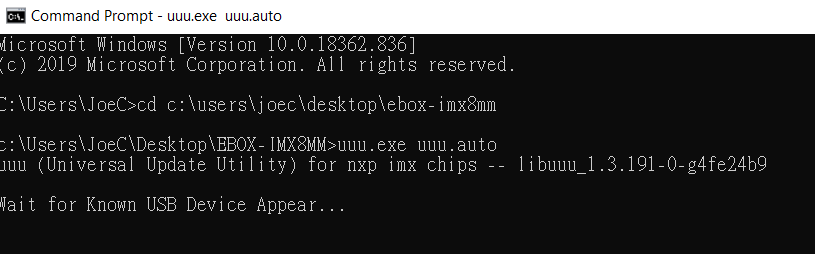
On Win10 host PC, please use
uuu.exe xxxxxx.auto
(xxxxxx depends on which audio chip has been used)
You will see “Wait for known USB Device Appear“
5. Connect the CABLE-MINIDIN8P-30 to the PN8M-090T, and it will trigger the serial download mode to restore the image from the host PC.
6. Wait after the restore process is done.
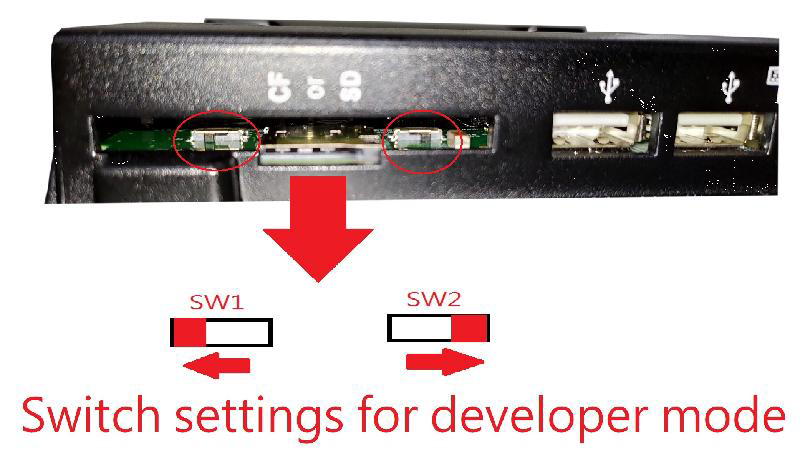
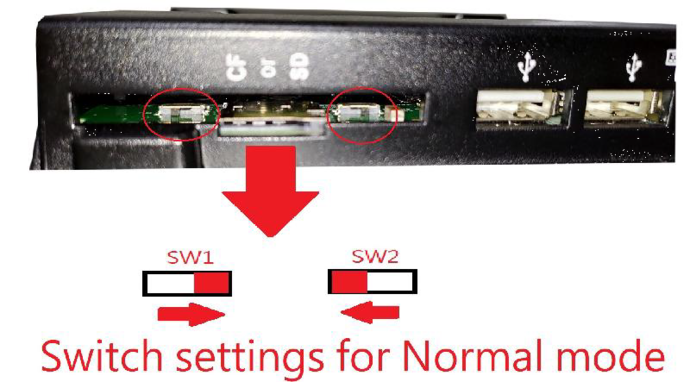
7. Remove the CABLE-MINIDIN8P-30 on the PN8M-090T, and set the SW1 and SW2 as the photo below
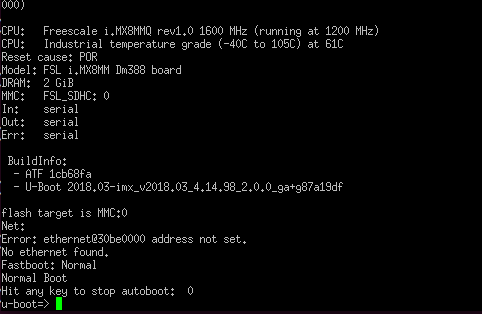
8. Power on the PN8M-090T and you can see the Yocto Linux booting.
If you press any key while booting up, we will access the U-boot mode.

For more info and sample request, please write to info@icop.com.tw, call your nearest ICOP Branch, or contact our Worldwide Official Distributor.